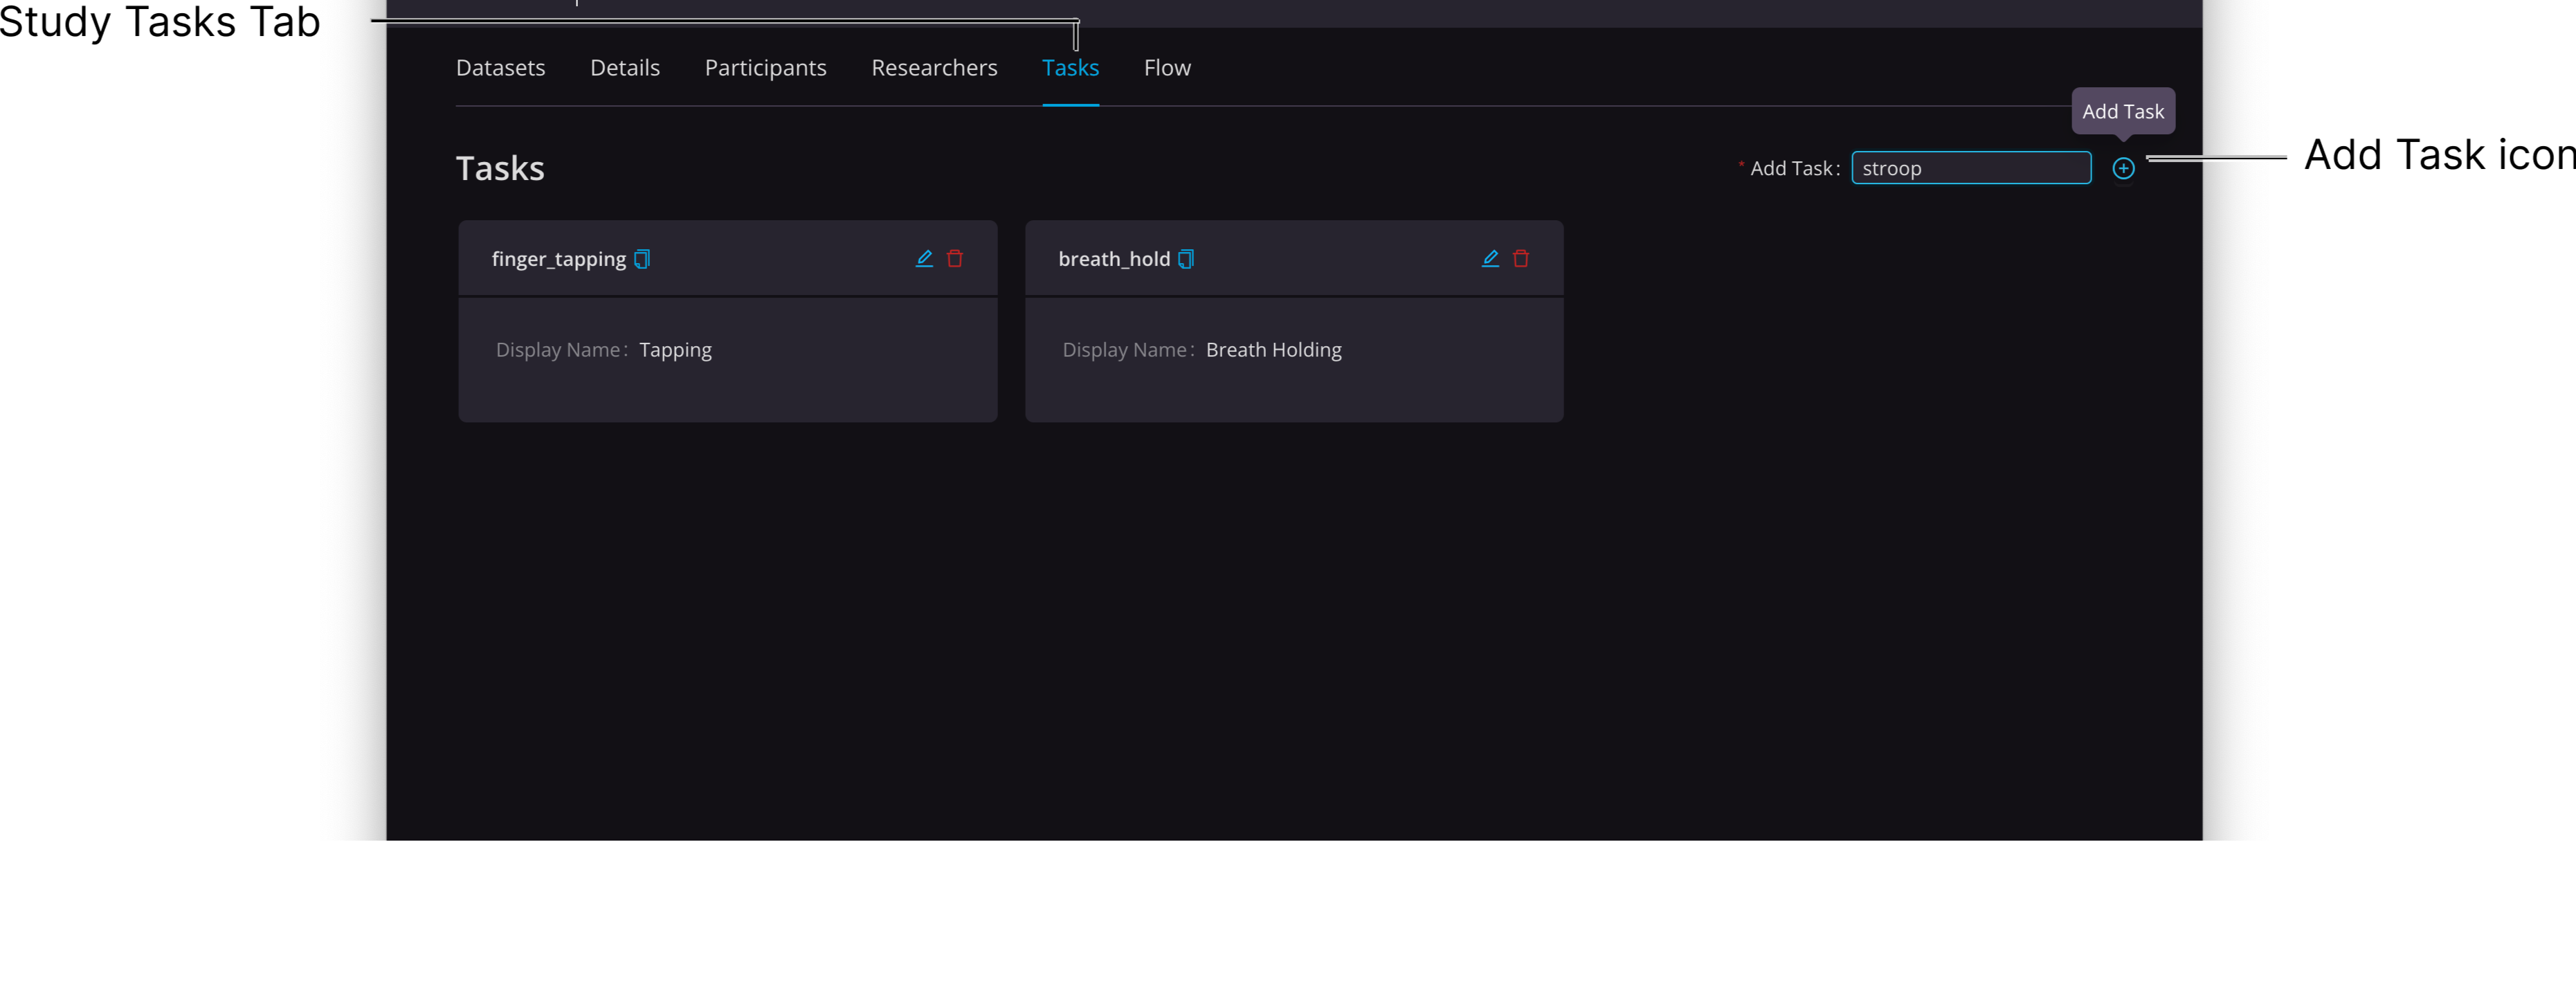
Studies can optionally contain Task names. During a recording, the researcher operating Flow can assign one of the pre-established Task names from the selected Study to each individual dataset.
To add a Task name:
- From the desired Study in Portal, click the Tasks tab.
- Type a name into the Add Task field and click the Add Task plus icon.
 The Task Name is added to the Tasks List for that Study, and also appears in the Task pop-up menu of the Data Acquisition section of Portal's Flow UI for recording data.
To change a Task's display name:
You may want your Task to be identified on the backend with a certain name but displayed in a dataset's metadata with another name. For example, you may want to identify a task as "Wisconsin Card Sorting Task" but for display purposes make it "WCST." The display name is what shows up in the drop-down menu when selecting a Task name in the Portal Flow UI, and when filtering datasets by Task Name on the Datasets tab.
- In the Tasks List on the Tasks tab of this Study, click the blue Edit icon to the right of the Task name whose display name you want to edit.
- Enter a display name in the Display Name box.
- Press Submit.
To Remove a Task name:
- In the Tasks List on the Tasks tab of this Study, click the red trash icon to the right of the Task name you want to remove.
A confirmation dialog appears. - Click OK.
The Task name is deleted. This action is permanent.