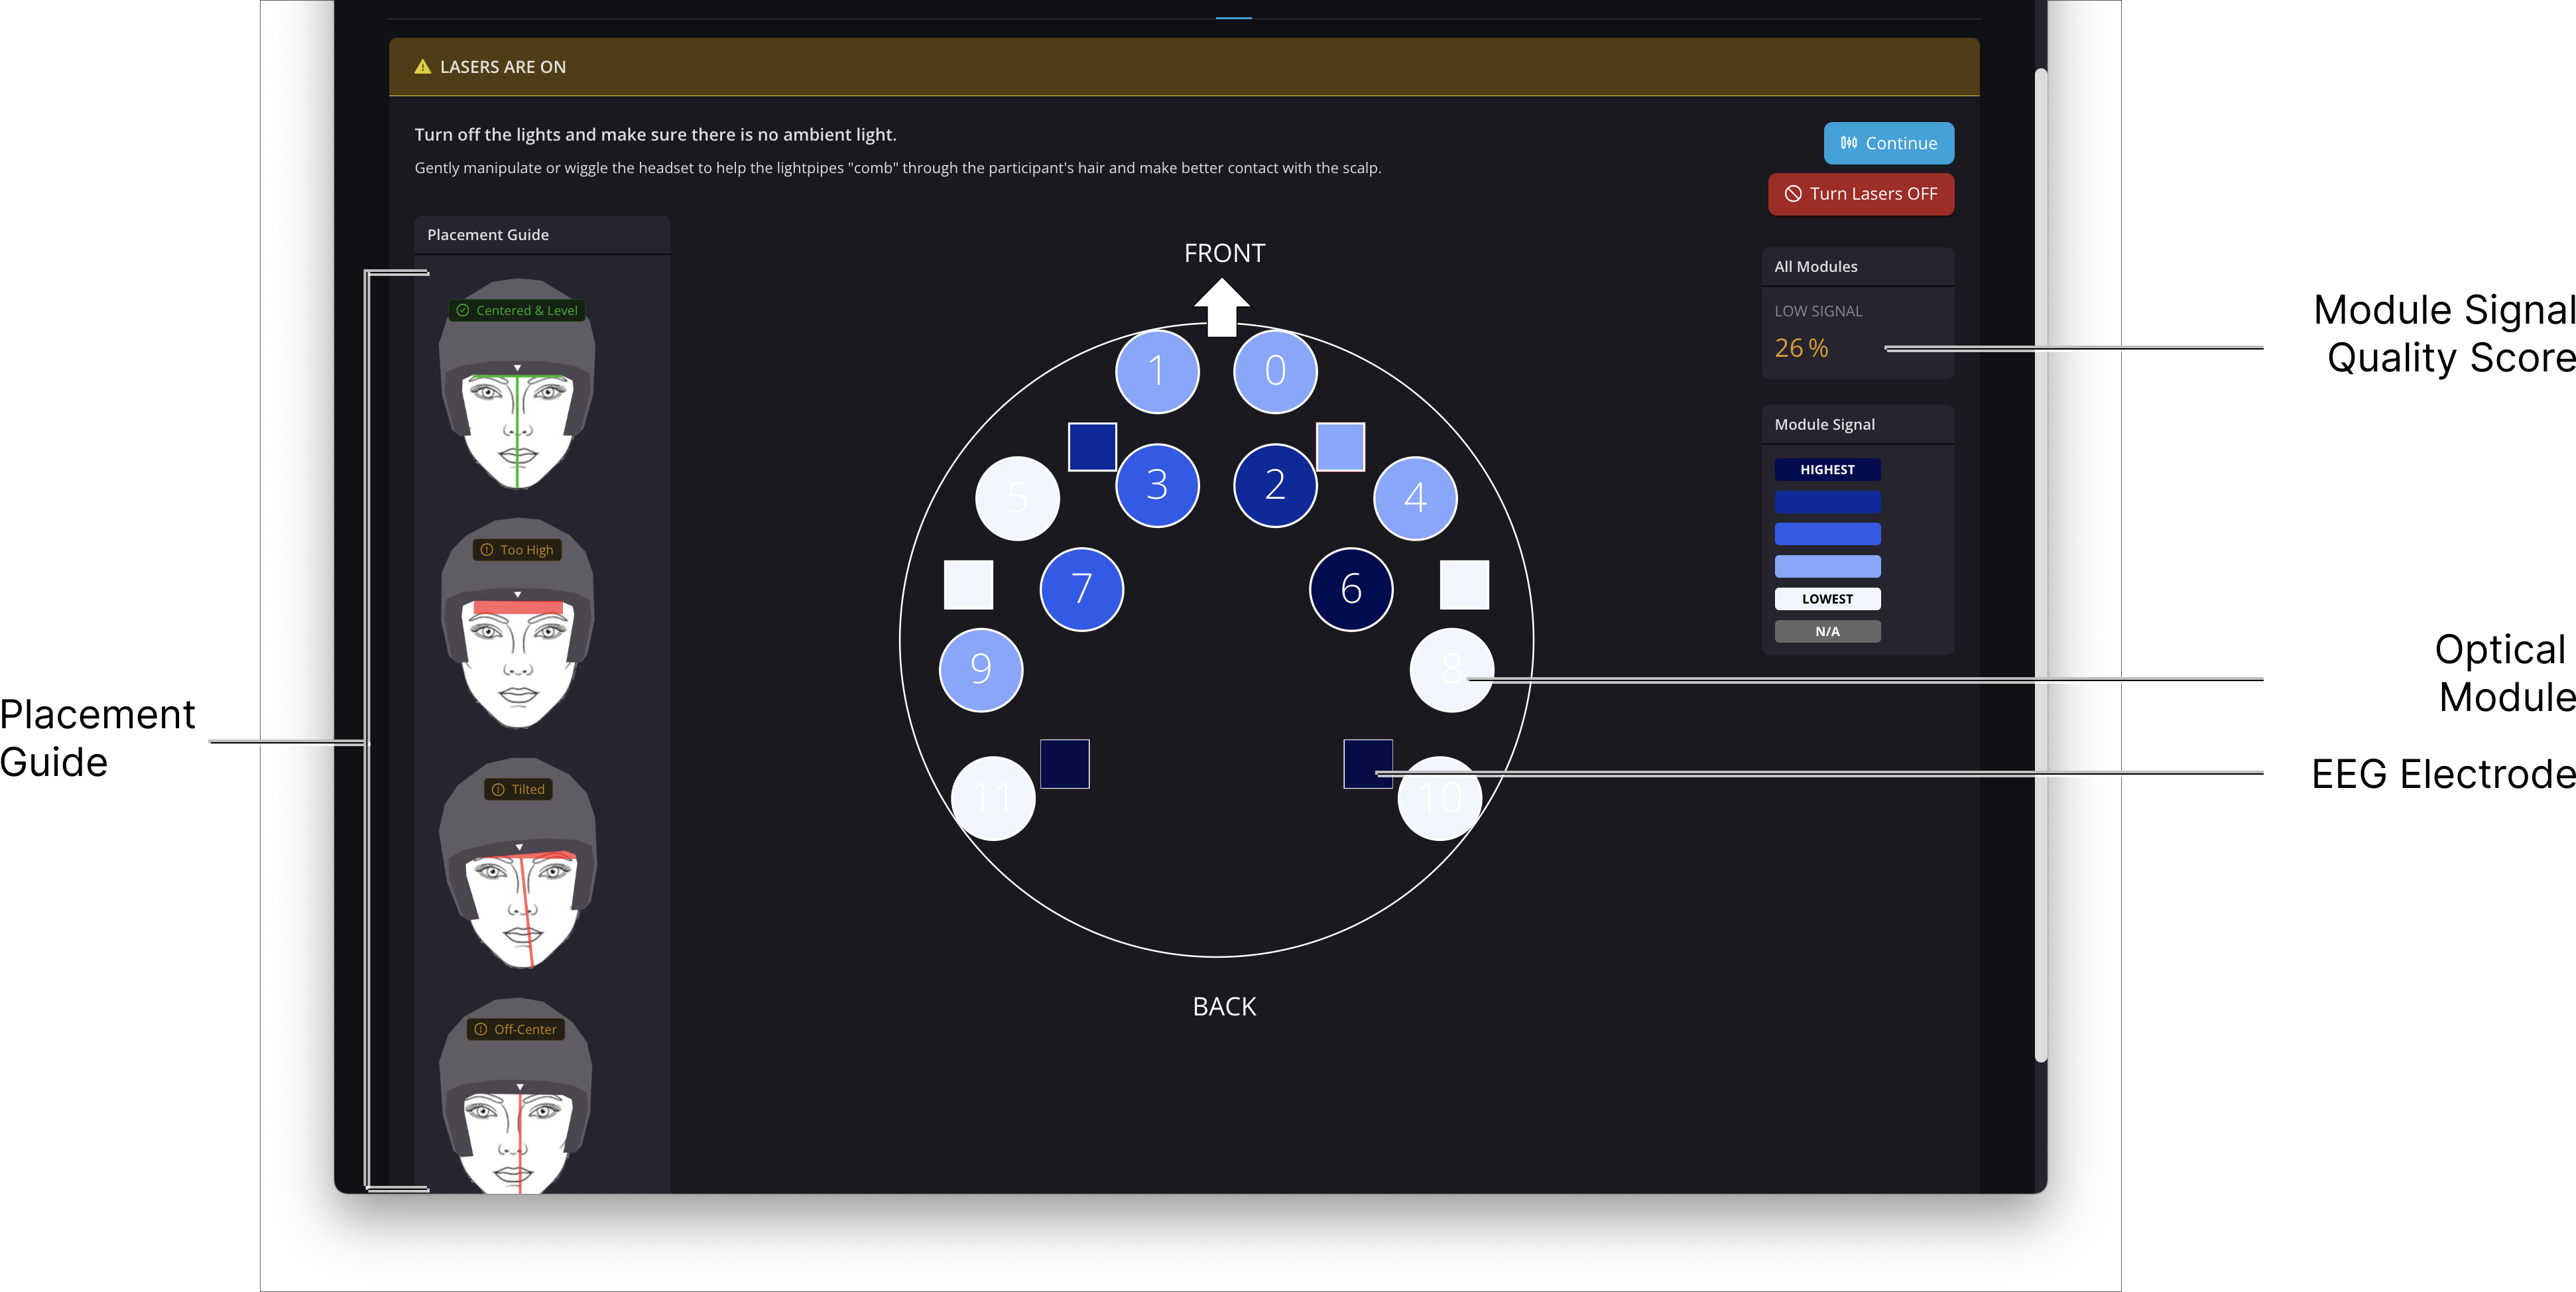
With the DevKit on the head, press the Turn Lasers ON button on the Portal Flow UI to enable the lasers.
On the Flow tab of a study in Portal, you will see a map that shows the signal strength of the data for each module. This metric measures how much light reaches the detectors from the light sources within a module. It can be seen as a proxy for how well-coupled the light sources and detectors are to the participant's scalp and therefore how much analyzable data will be received for each module. The signal strength of each module is depicted with a color scale, where white/light blue shades indicate a low/negligible amount of analyzable data and darker blue shades indicate the opposite.
For the DevKit, the Portal Flow UI displays a single score to summarize the overall coupling. It represents the percentage of data that will be retained from all modules. The scores fall into one of four categories: Lowest, Low, High, and Highest. You should aim to get this number in the High (>= 40%) or Highest (>= 80%) range.
 Improving Coupling
As a first pass at increasing signal quality, instruct the participant to gently move the cap side to side and/or in figure-eight motions. This helps to comb the light pipes through their hair. The participant may gently grasp multiple modules on the side (taking care to avoid unplugging module USB-C cables) for leverage. To improve the coupling on a specific module as indicated by the Flow UI map, the participant should gently grasp the individual module and move it in a circular motion.
Below is an example of how much this process can improve coupling.

Aligning the Headset
After any adjustments to improve the signal, face the participant head-on and check the front of the headset to make sure it is still in an appropriate position on the forehead. The two front bottom-most modules should be centered between the eyebrows and around the bridge of the nose.
The optimal positioning of the DevKit will depend on your specific study design and desired outcomes. The instructions and placement guide provided above are recommendations for using the reference design cap included in your shipment (and are identical to the placement recommendations for our Flow2 device). Adjustments may be necessary to tailor the setup to your particular needs and objectives.