The following instructions are specific to the reference design cap that arrives in your DevKit shipment. They do not apply to a cap assembled from scratch.
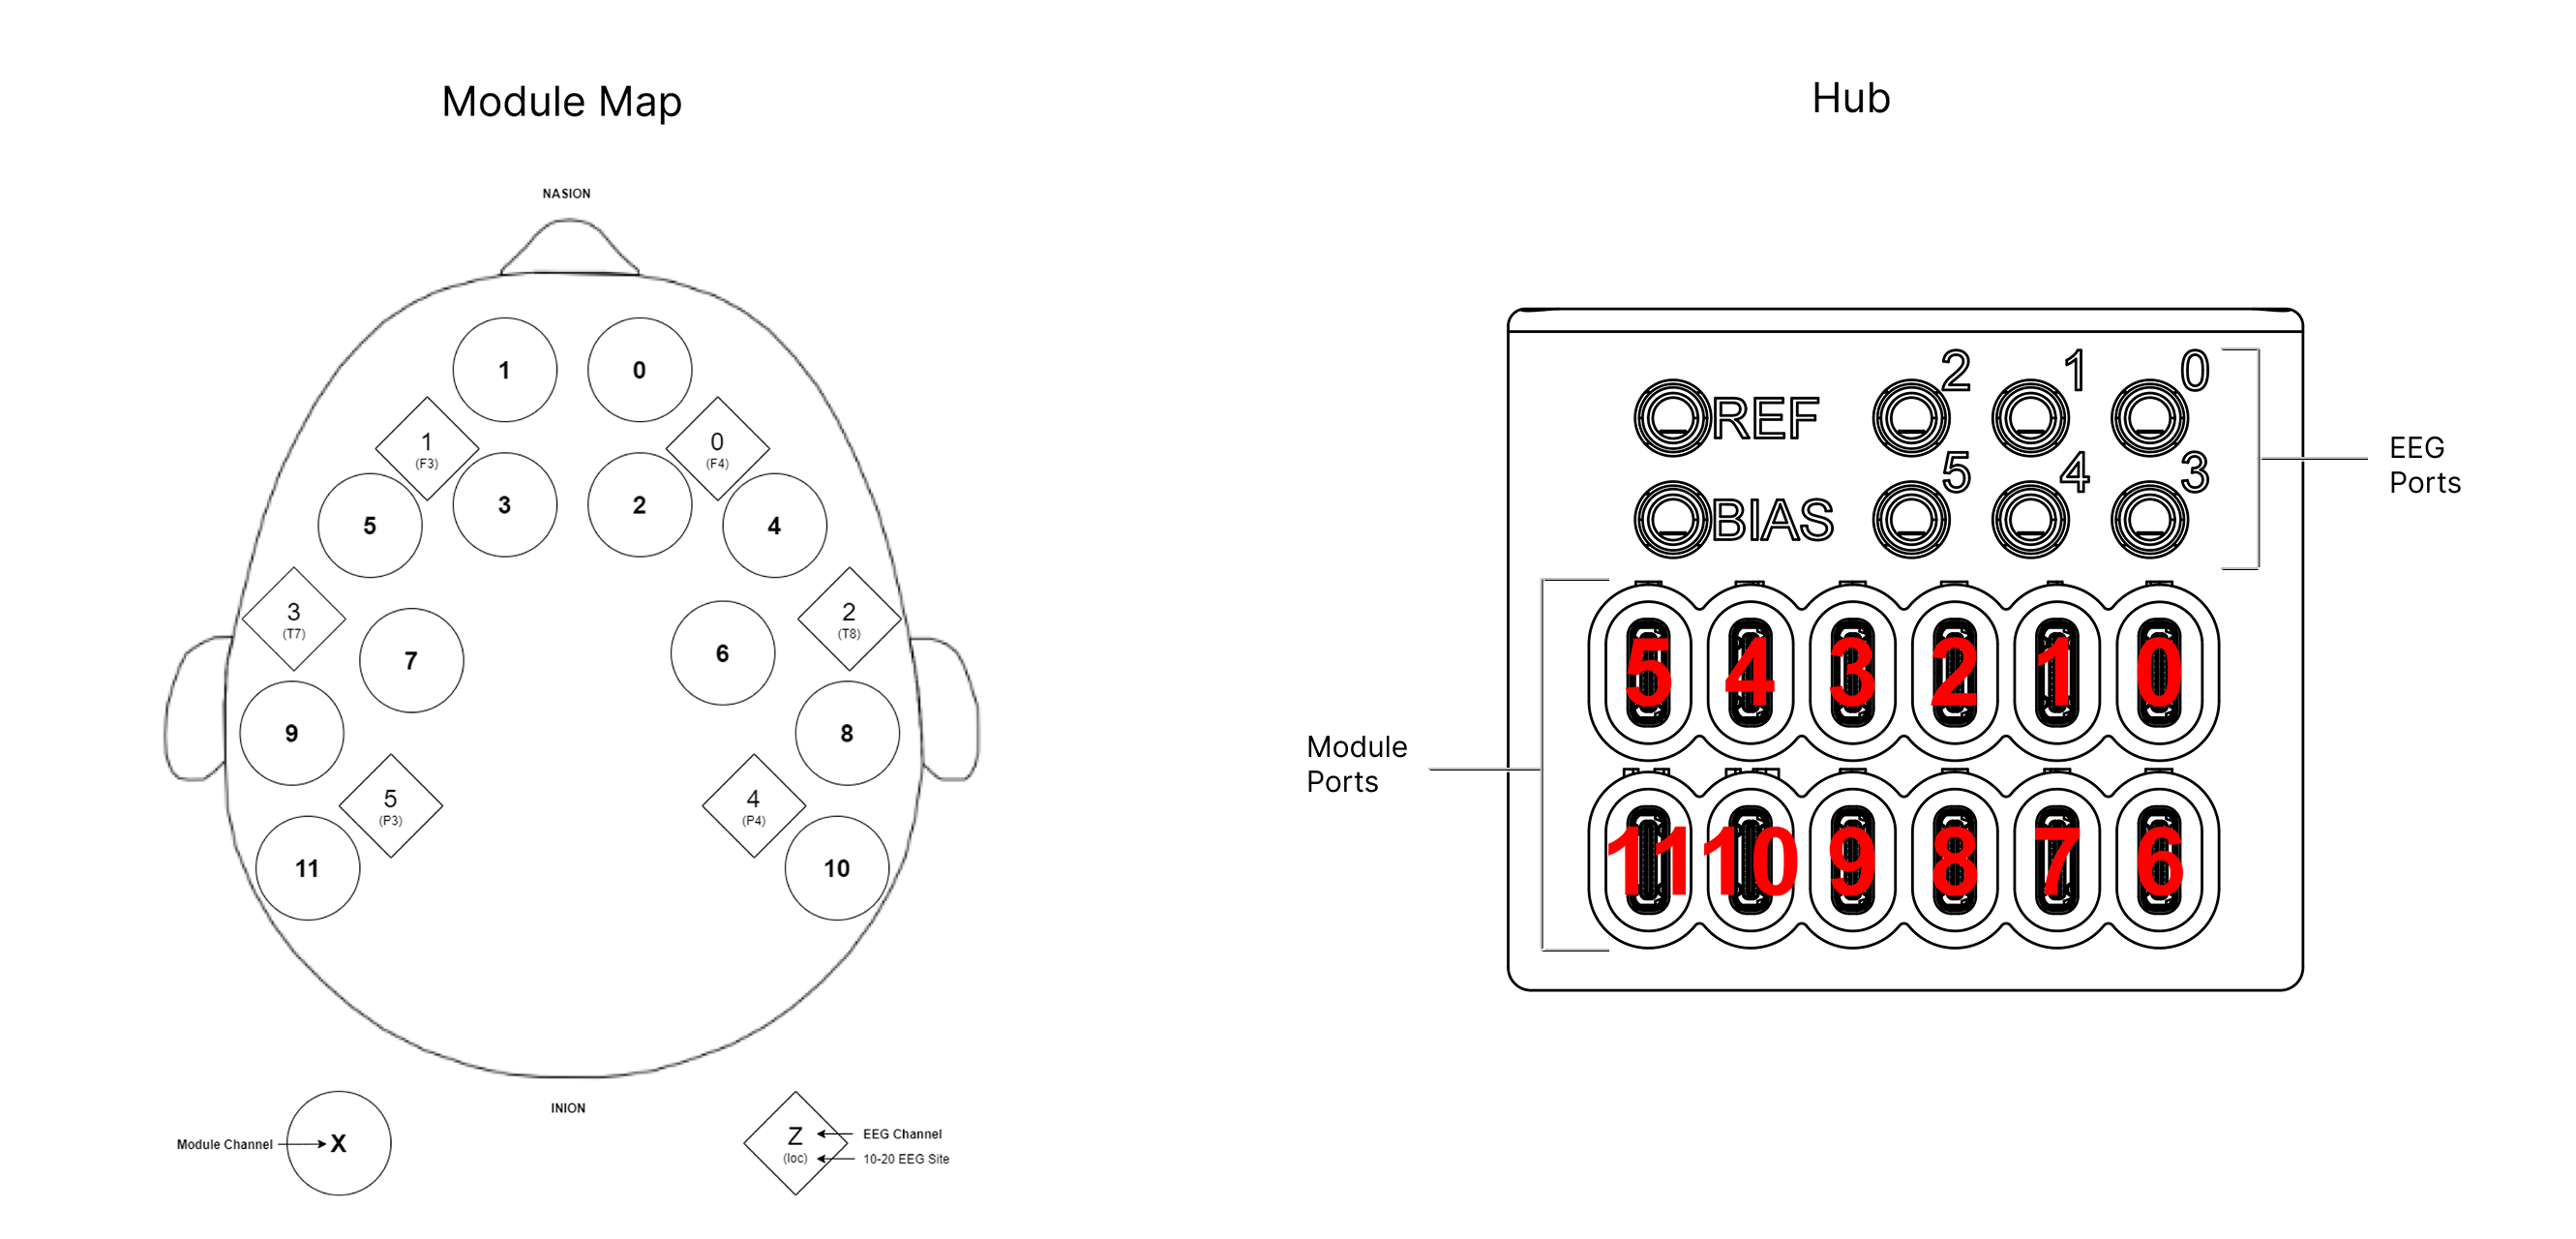
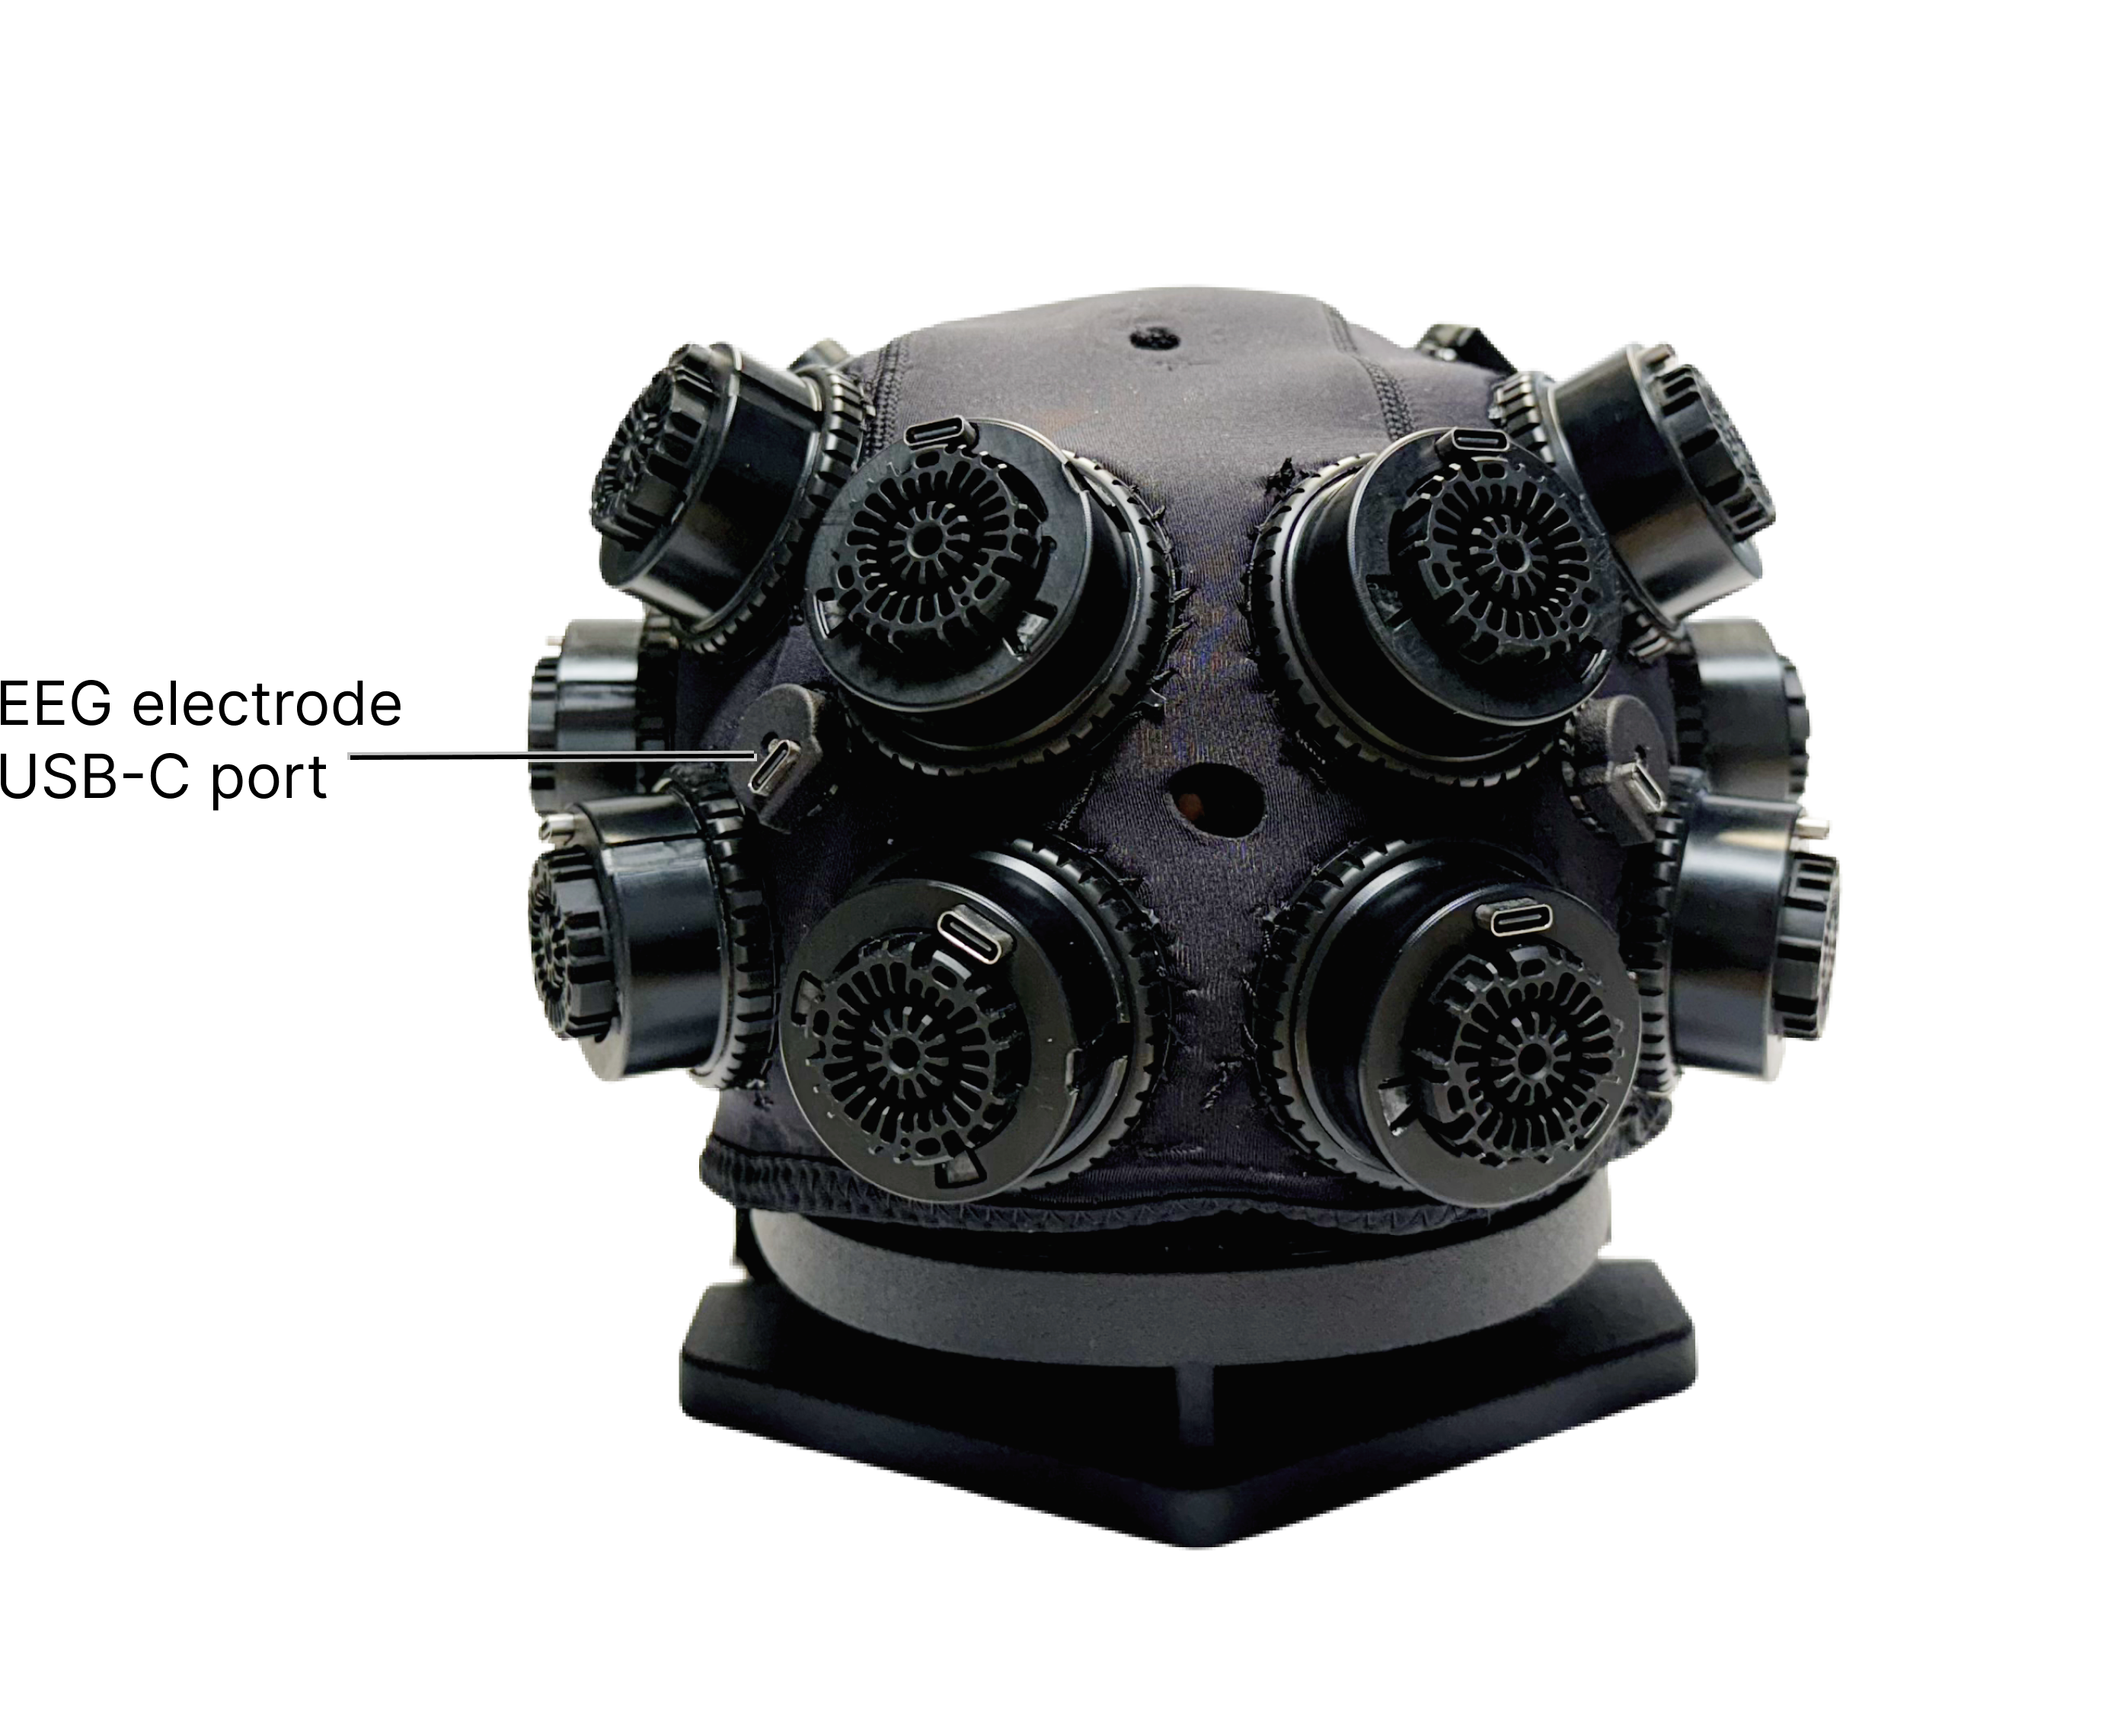
The DevKit arrives with 12 modules in a neoprene cap, which will need to be cabled before use. The below maps display the matching numbered locations on a 2D projection of the cap as well as on the Hub. Use these maps to cable your system.
Cabling the DevKit
1. Connect the Modules to the Hub:
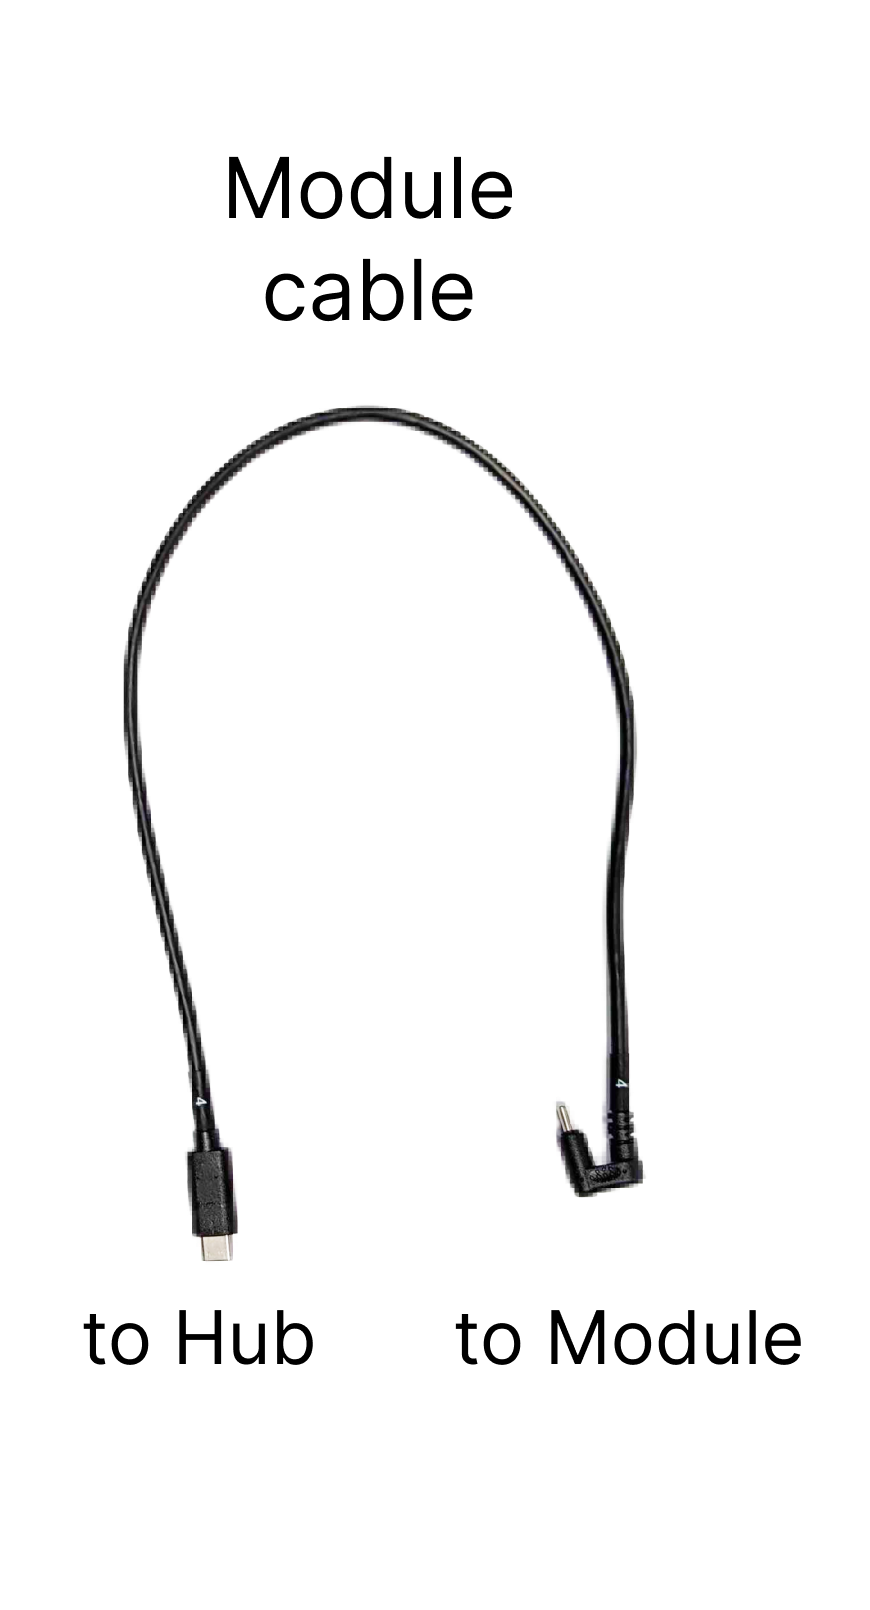
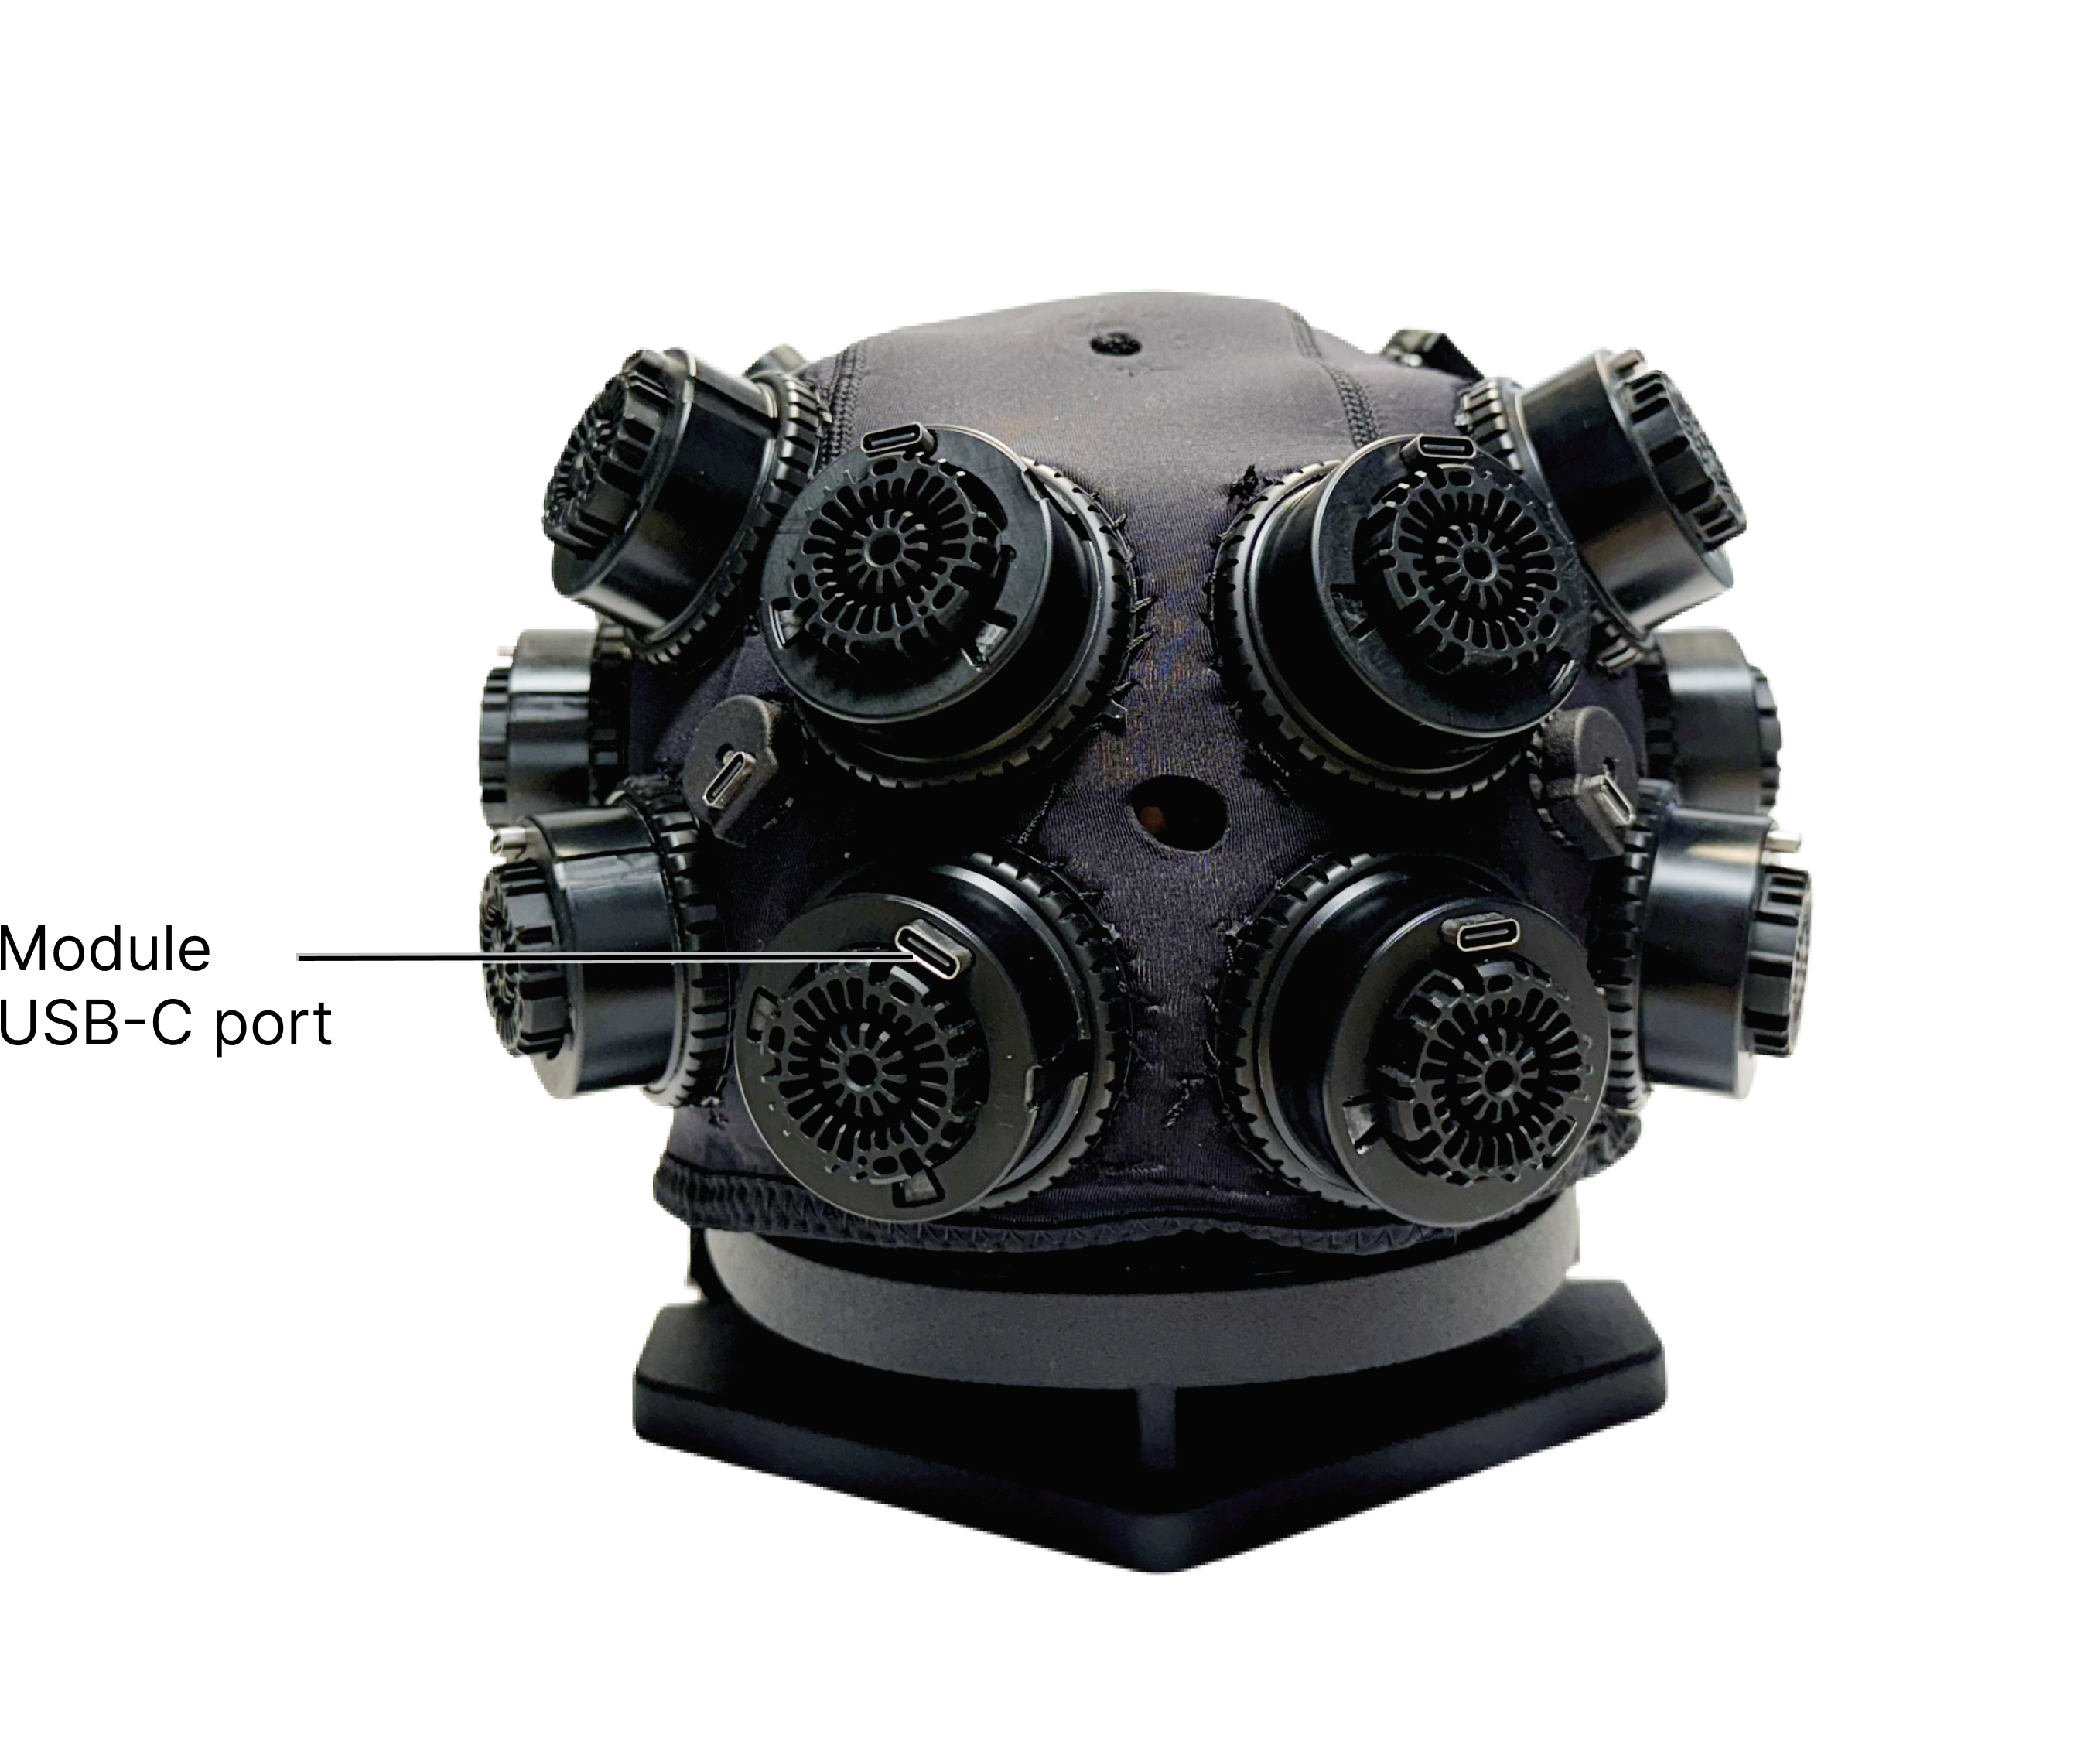
- Use the 12 provided USB-C to USB-C module cables.
- Each cable is labeled on either end with a number from 0 to 12, both on the hooked end and the straight end. The hooked end should be plugged into the module USB-C port and the straight end into the Hub USB-C port.
- Using the maps provided above, attach each cable to the module and Hub port of the corresponding number. For example, connect the hooked end of the cable labeled "1" to module 1 and the straight end of the same cable to the Hub's module port 1.
2. Connect the EEG Electrodes:
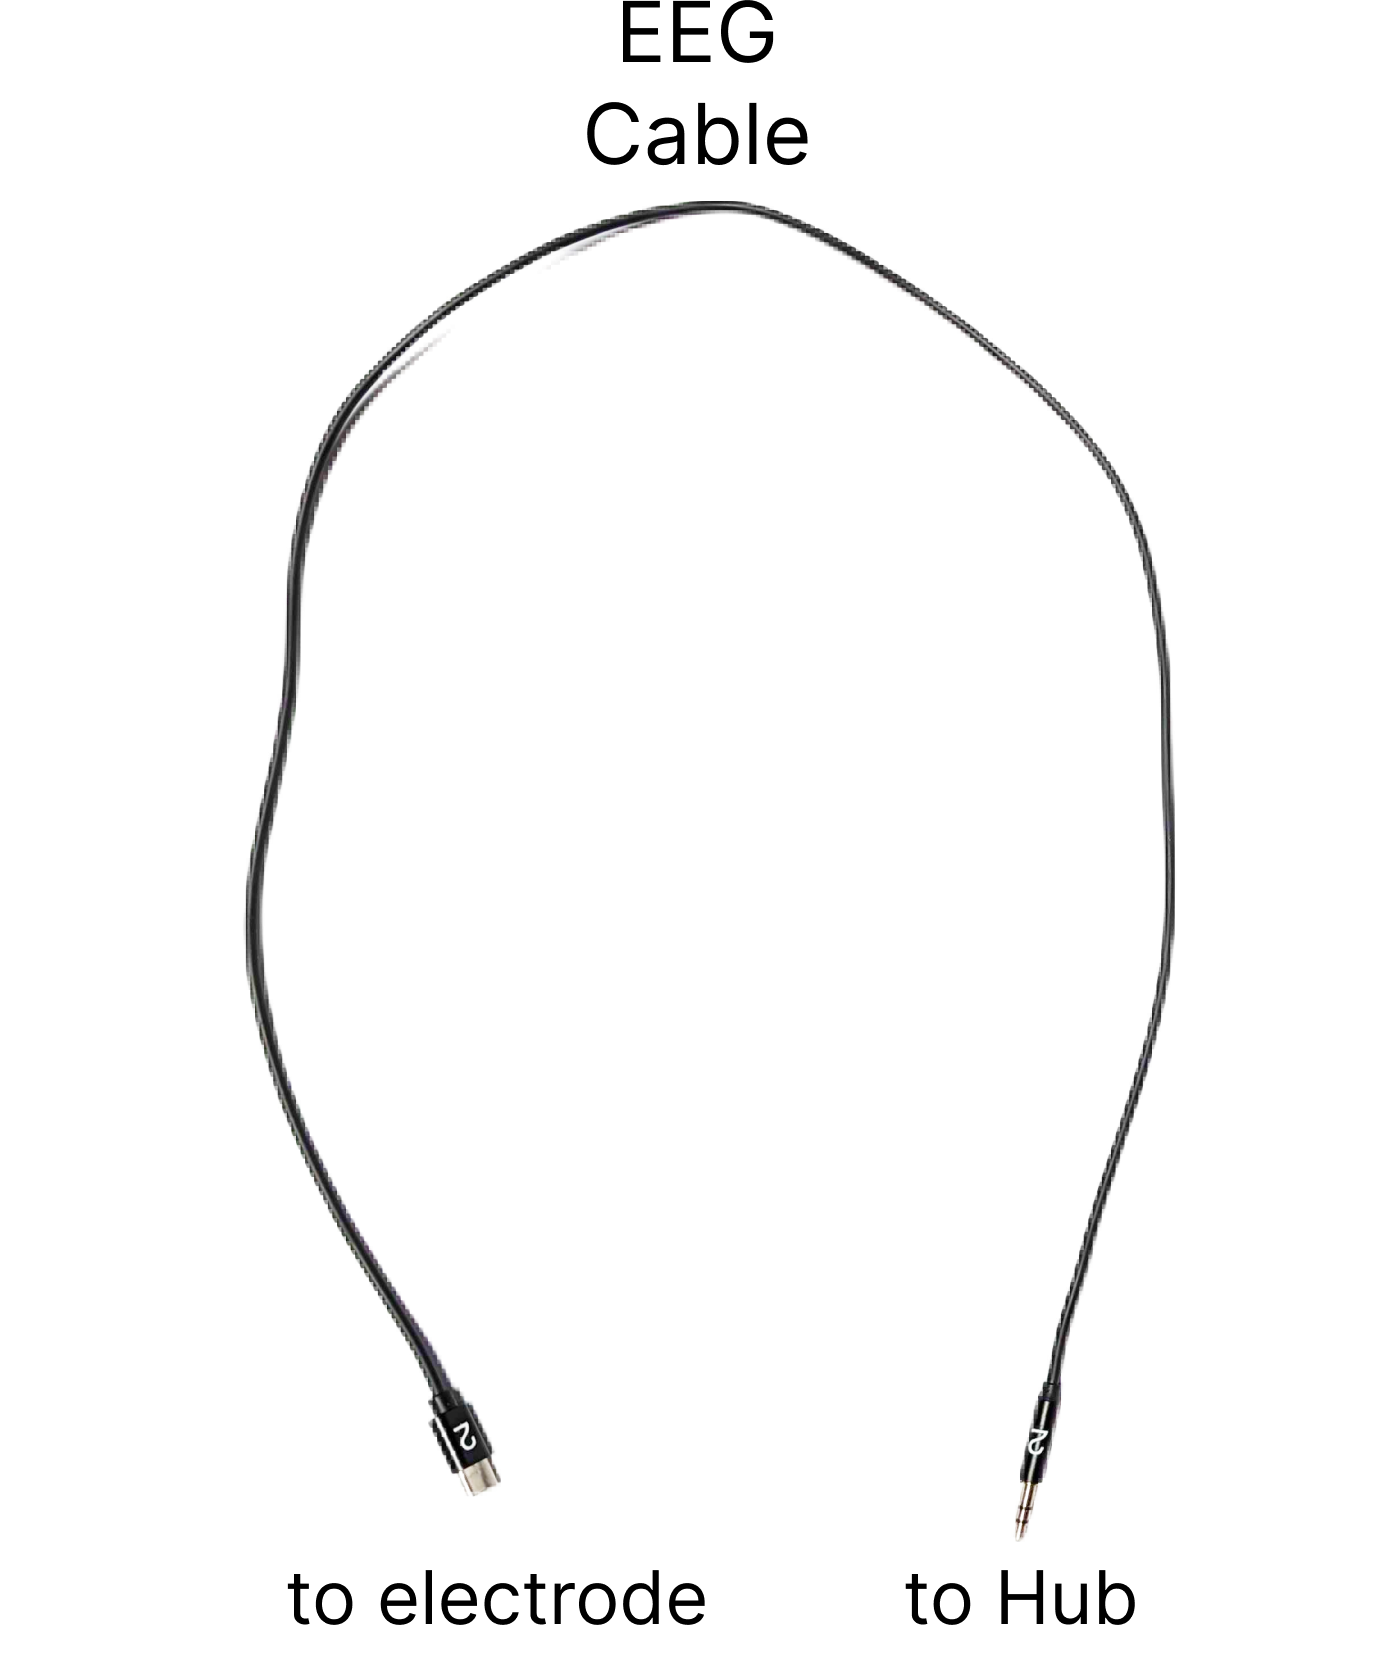
- Use the 6 provided USB-C to 3.5 mm jack EEG cables and 2 provided Reference/Bias lead cables (with earlobe clips on their ends).
- Each cable is labeled on either end with a number from 0 to 5.
- Using the maps provided above, attach the USB-C side of each cable to the EEG electrode and the 3.5-mm jack side to the Hub port of the corresponding number.
- Attach the 3.5-mm jack side of the Reference/Bias lead cables (labeled with REF and BIAS) to the Hub ports labeled R (for REF) and B (for BIAS) above.
3. Reroute the Cables:
- With the cap facing away from you, reroute the cables as needed.
- Attempt to reduce tension on the cables that are furthest from the Hub (the frontmost modules).
- You may use the provided cable wrapper to bundle the module cables when done.
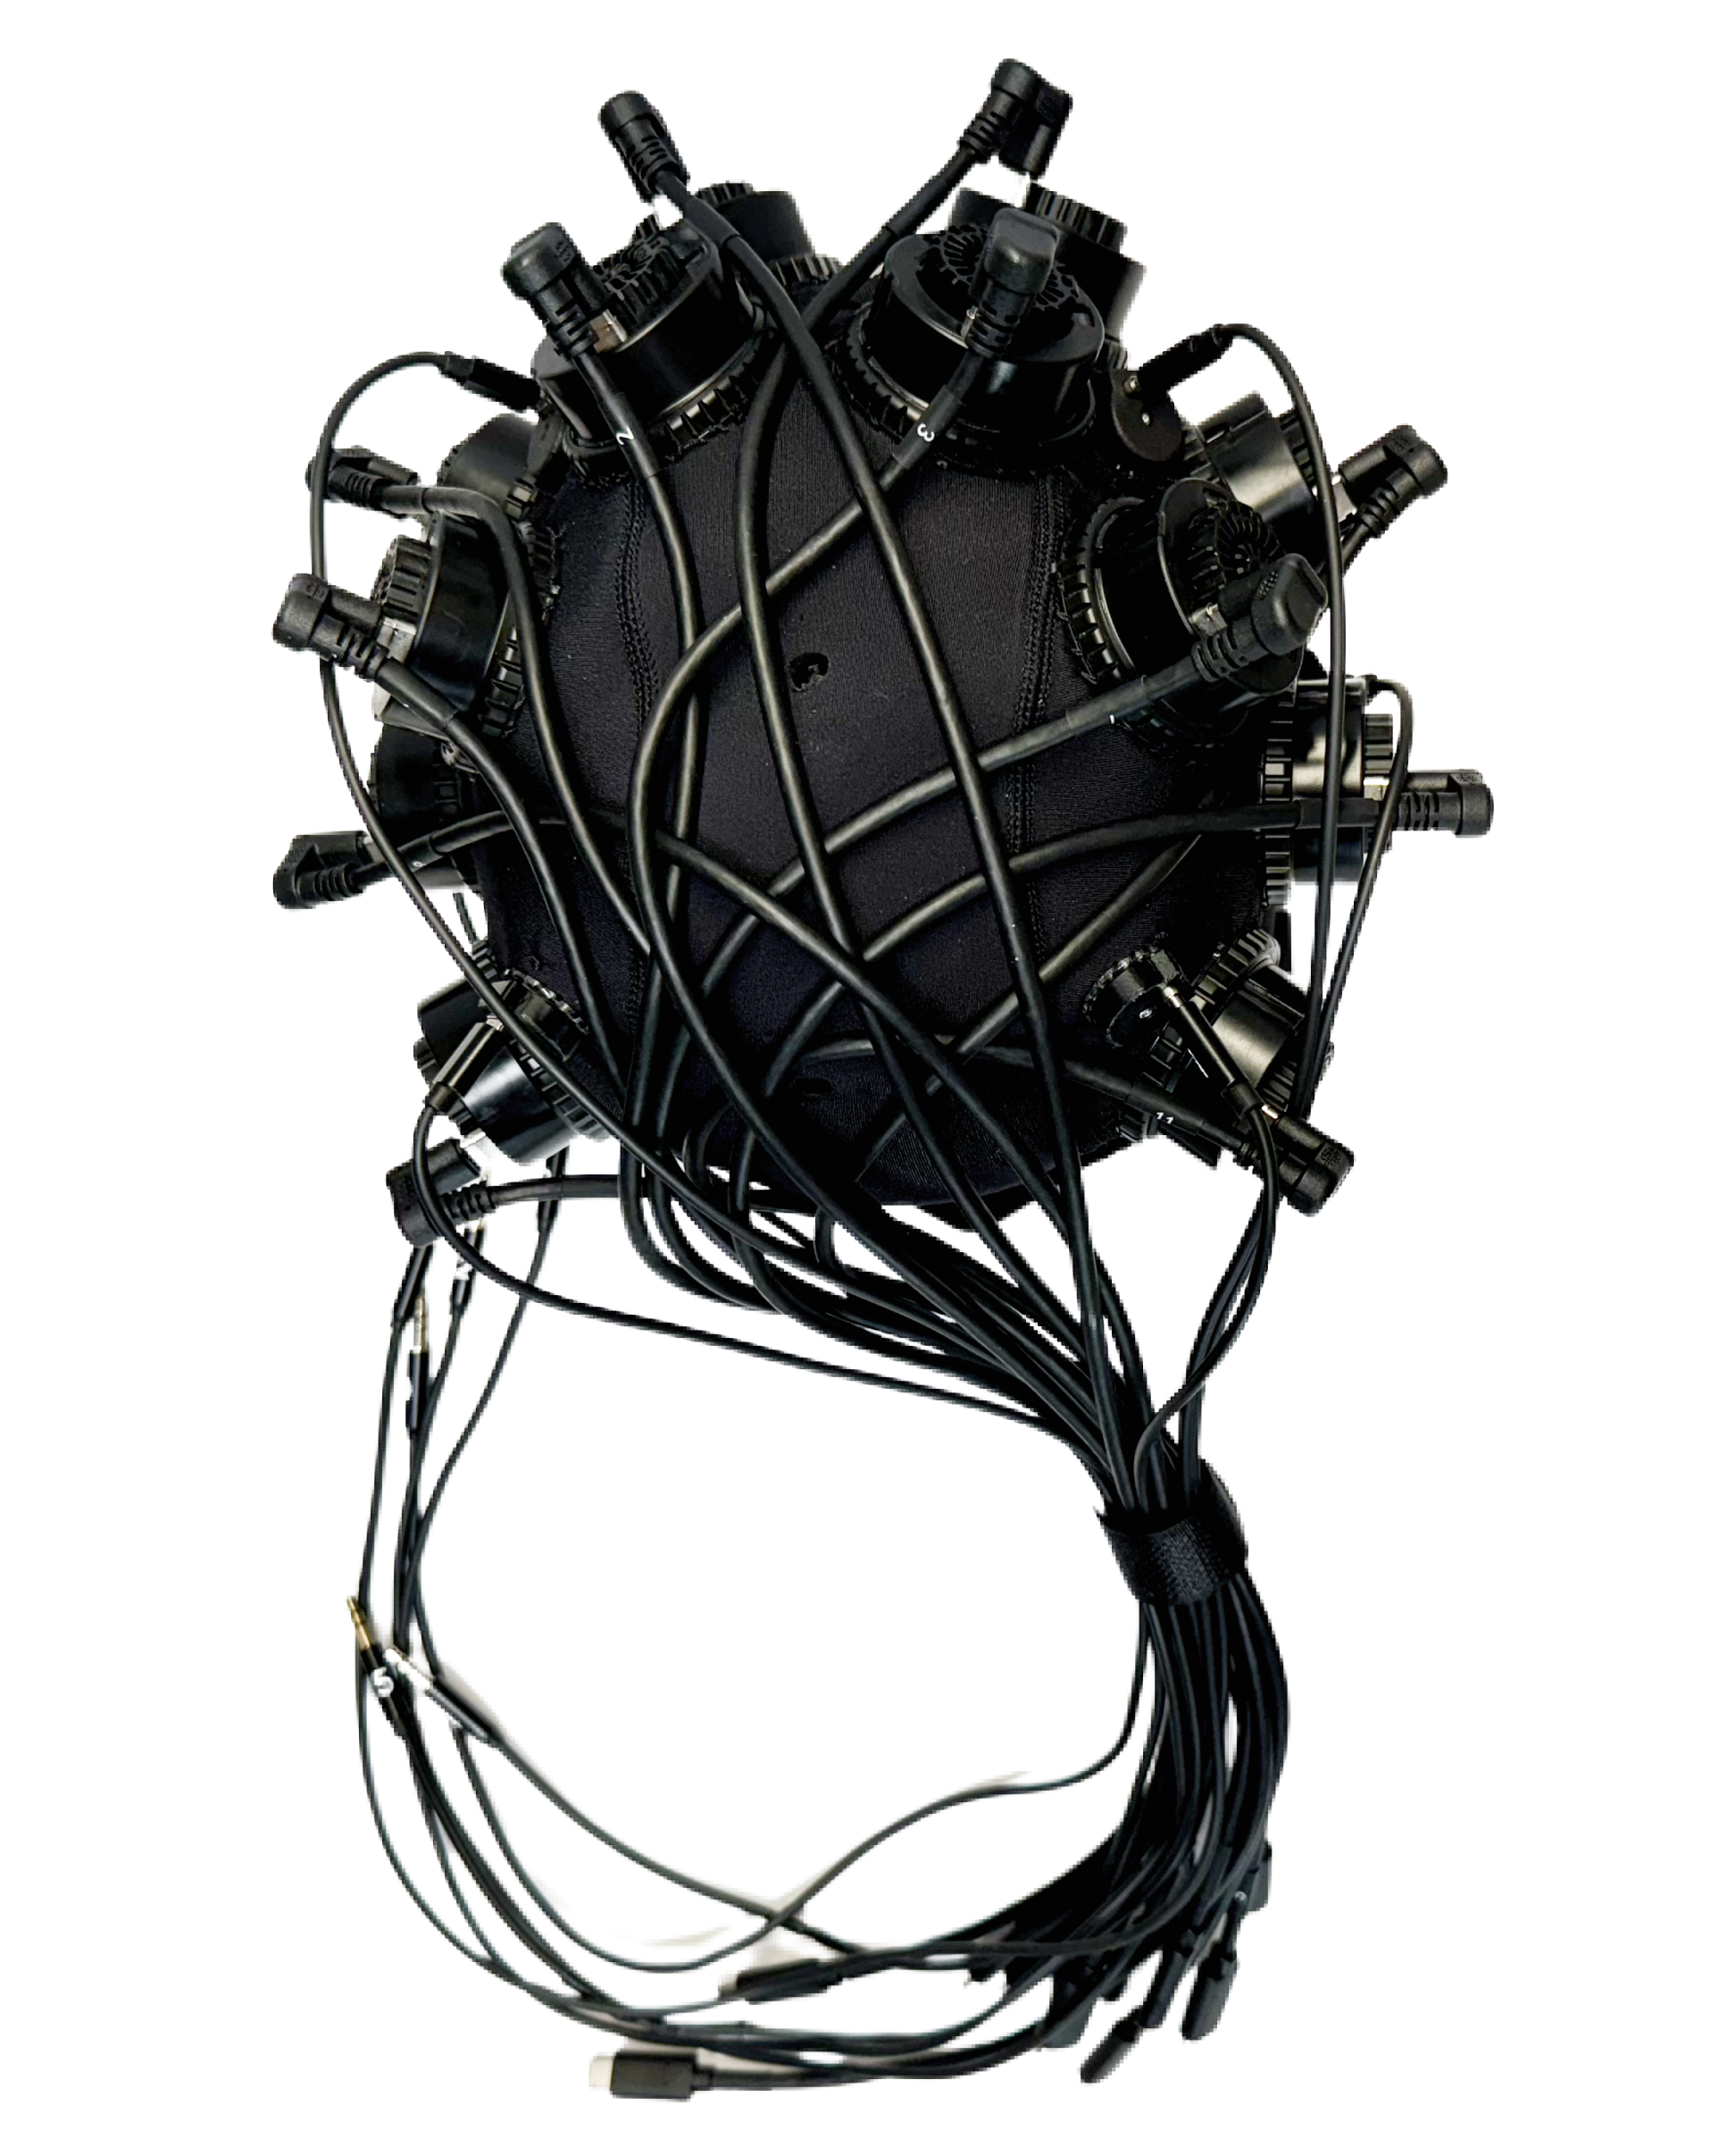 Properly-cabled headset birds-eye view