Setting up the Flow System
The Flow Headset arrives packed in its case with a layer of foam between the headset and the Headset Stand. Remove the foam before first use.
Before beginning, ensure you are using a computer with Kortex installed (see Installing the Acquisition Driver). If using a laptop, plug it into a power source to prevent battery loss during use.
There are two versions of the Power/Data Cable, depending on when the Flow headset was purchased.
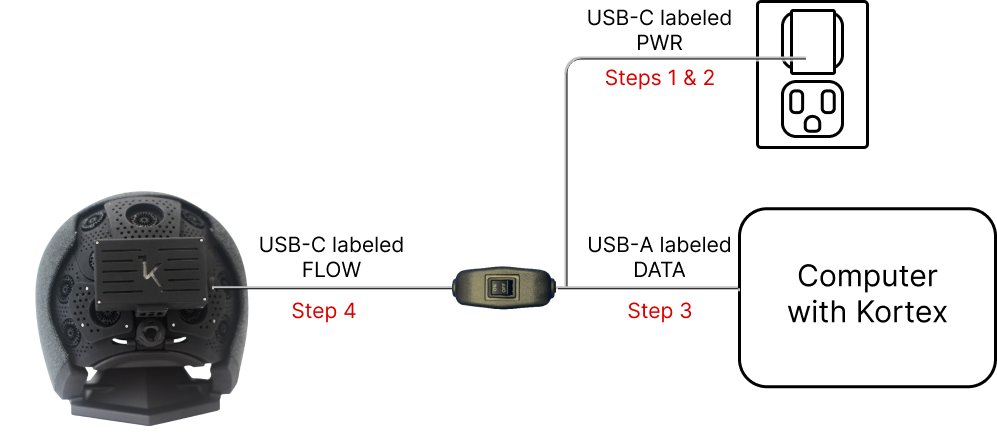
Original Power/Data Cable (With On/Off Switch)
This cable has three branches and includes an On/Off Switch at the split point.
- Plug the Kernel-provided Power Bank into a wall outlet or power strip.NOTE:Use only the Kernel-provided Power Bank or an equivalent 100-Watt power brick.
- Plug the shorter USB-C end of the Power/Data Cable (labeled PWR) into the Kernel Flow Power Bank.
- Plug the USB-A end of the Power/Data Cable (labeled DATA) into the USB-A port of your data acquisition computer.
- If your data acquisition device has only USB-C ports, use a USB-A to USB-C adapter.
- Plug the long USB-C end of the Power/Data Cable (labeled FLOW) into the USB-C connector on the Hub of the headset.
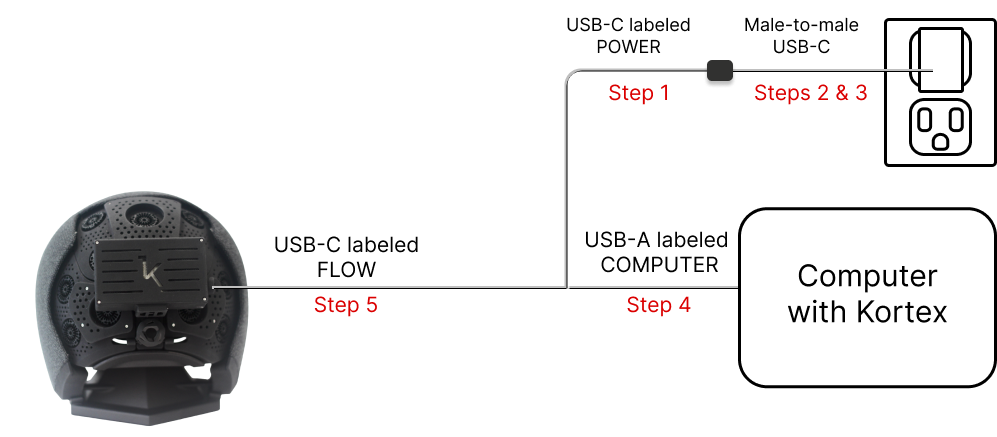
New Power/Data Cable (Without On/Off Switch)
This version is three-pronged but does not include an On/Off switch, and comes with a male-to-male USB-C connector.
- Plug the female USB-C end of the Power/Data cable (labeled POWER) into one side of the male-to-male USB-C connector.
- Plug the other side of the male-to-male USB-C connector into the Kernel Flow Power Bank.
- Plug the Power Bank into a wall outlet or power strip.
- Plug the USB-A end of the cable Power/Data cable (labeled COMPUTER) into your data acquisition computer.
- If your data acquisition device has only USB-C ports, use a USB-A to USB-C adapter.
- Plug the USB-C end of the Power/Data cable (labeled FLOW) into the USB-C connector on the Hub of the headset.
NOTE:
You may use a different male-to-male USB-C connector if needed to accommodate your desired cable length.