On the Flow tab of a study in Portal, and with the headset on the head, press the Turn Lasers ON button on the Portal Flow UI to enable the lasers.
You will see a map that shows the signal strength of the data for each module. This metric measures how much light reaches the detectors from the light sources within a module. It can be seen as a proxy for how well-coupled the light sources and detectors are to the participant's scalp and therefore how much analyzable data will be received for each module. The signal strength of each module is depicted with a color scale, where white/light blue shades indicate a low/negligible amount of analyzable data and darker blue shades indicate the opposite.
Along with the signal map, the Portal Flow UI displays two scores to summarize the overall signal strength:
- High-Priority Modules: This is the percentage of data with high signal on the Frontal Plate and both Temporal Plates. Mouse over the score to see which modules it refers to exactly.
- All Modules: This is the percentage of data that will be retained from all modules.
The scores fall into one of four categories: Lowest, Low, High, and Highest. You should aim to get both numbers in the High (>= 40%) or Highest (>= 80%) range.
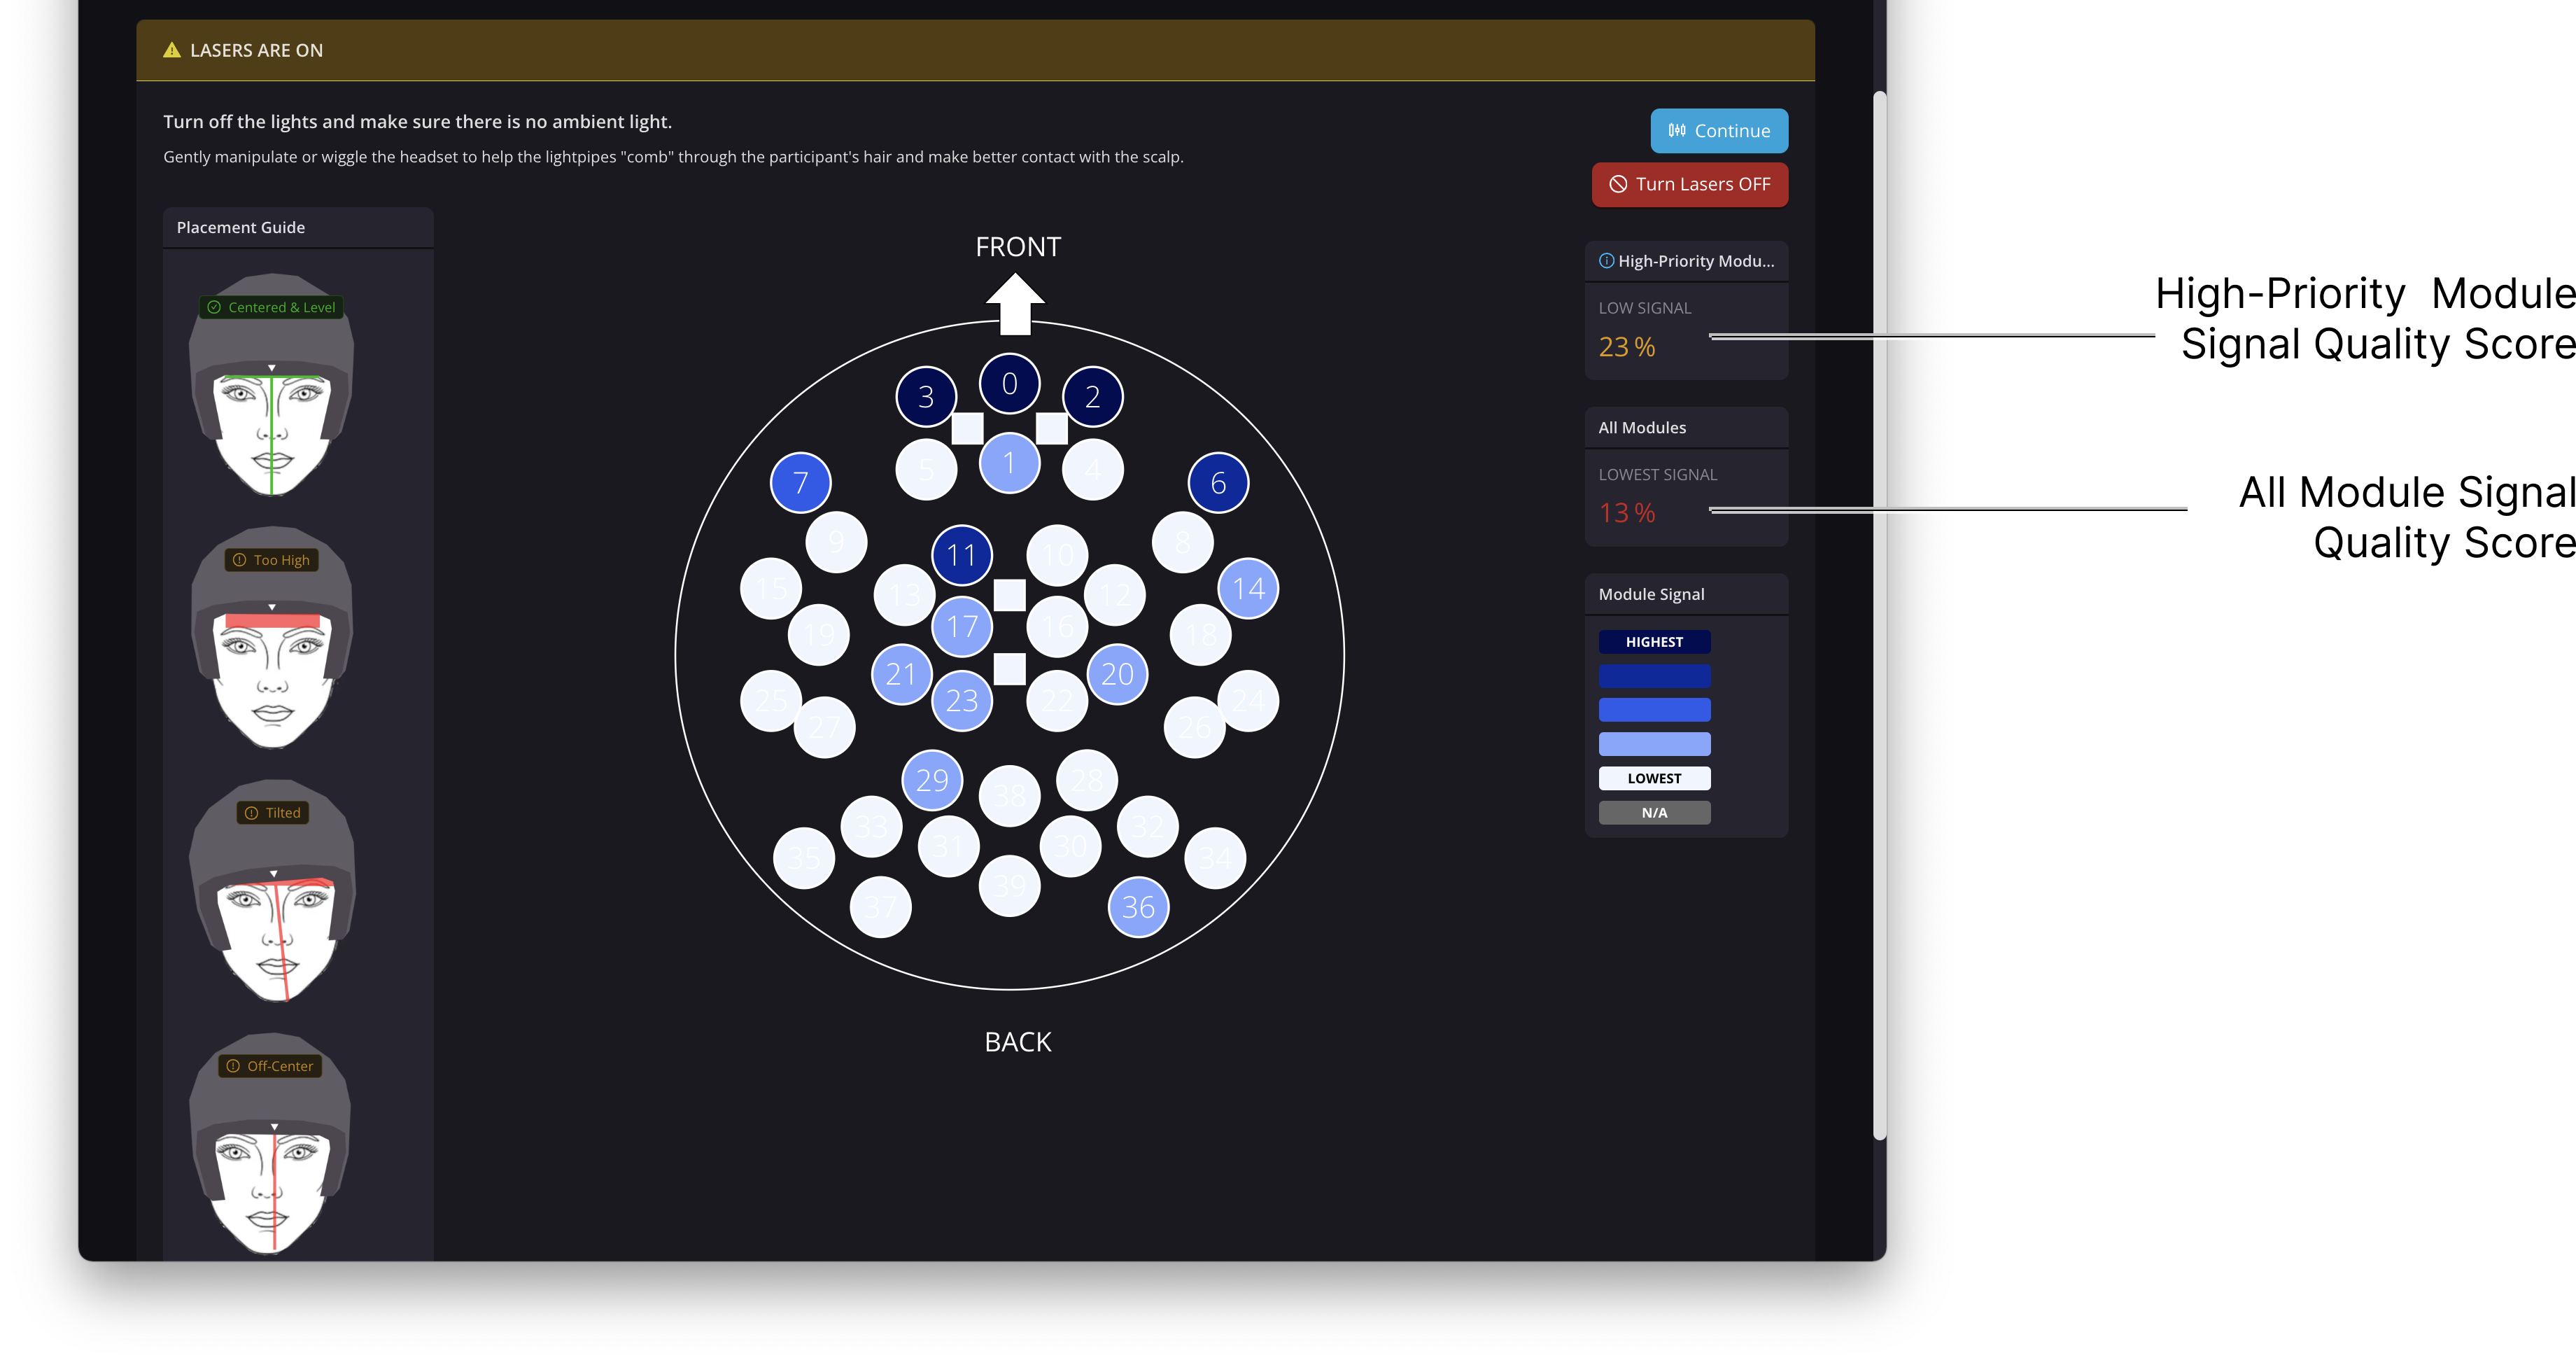
On the left side of the signal map, the Portal Flow UI displays 4 images that depict proper and improper placement of the headset. Always ensure that the headset is centered, with the white placement arrow directly between the eyebrows, level, and resting on the eyebrow line. Refer to Aligning and tightening the headset for further information.
Improving Signal
As a first pass at increasing signal quality, the operator may gently stretch the Ear Covers outwards and “wiggle” the headset side to side and/or in figure-eight motions to comb the light pipes through the participant’s hair. The participant should keep their head still as the headset slides over the scalp.
Often, the best signal strength is achieved when the participant wiggles the headset themselves, so the operator may ask the participant to perform the movement after demonstrating. As the participant wiggles, the operator can tighten the headset slowly using the Tension Dial. Below is an example of how much this process can improve signal strength.
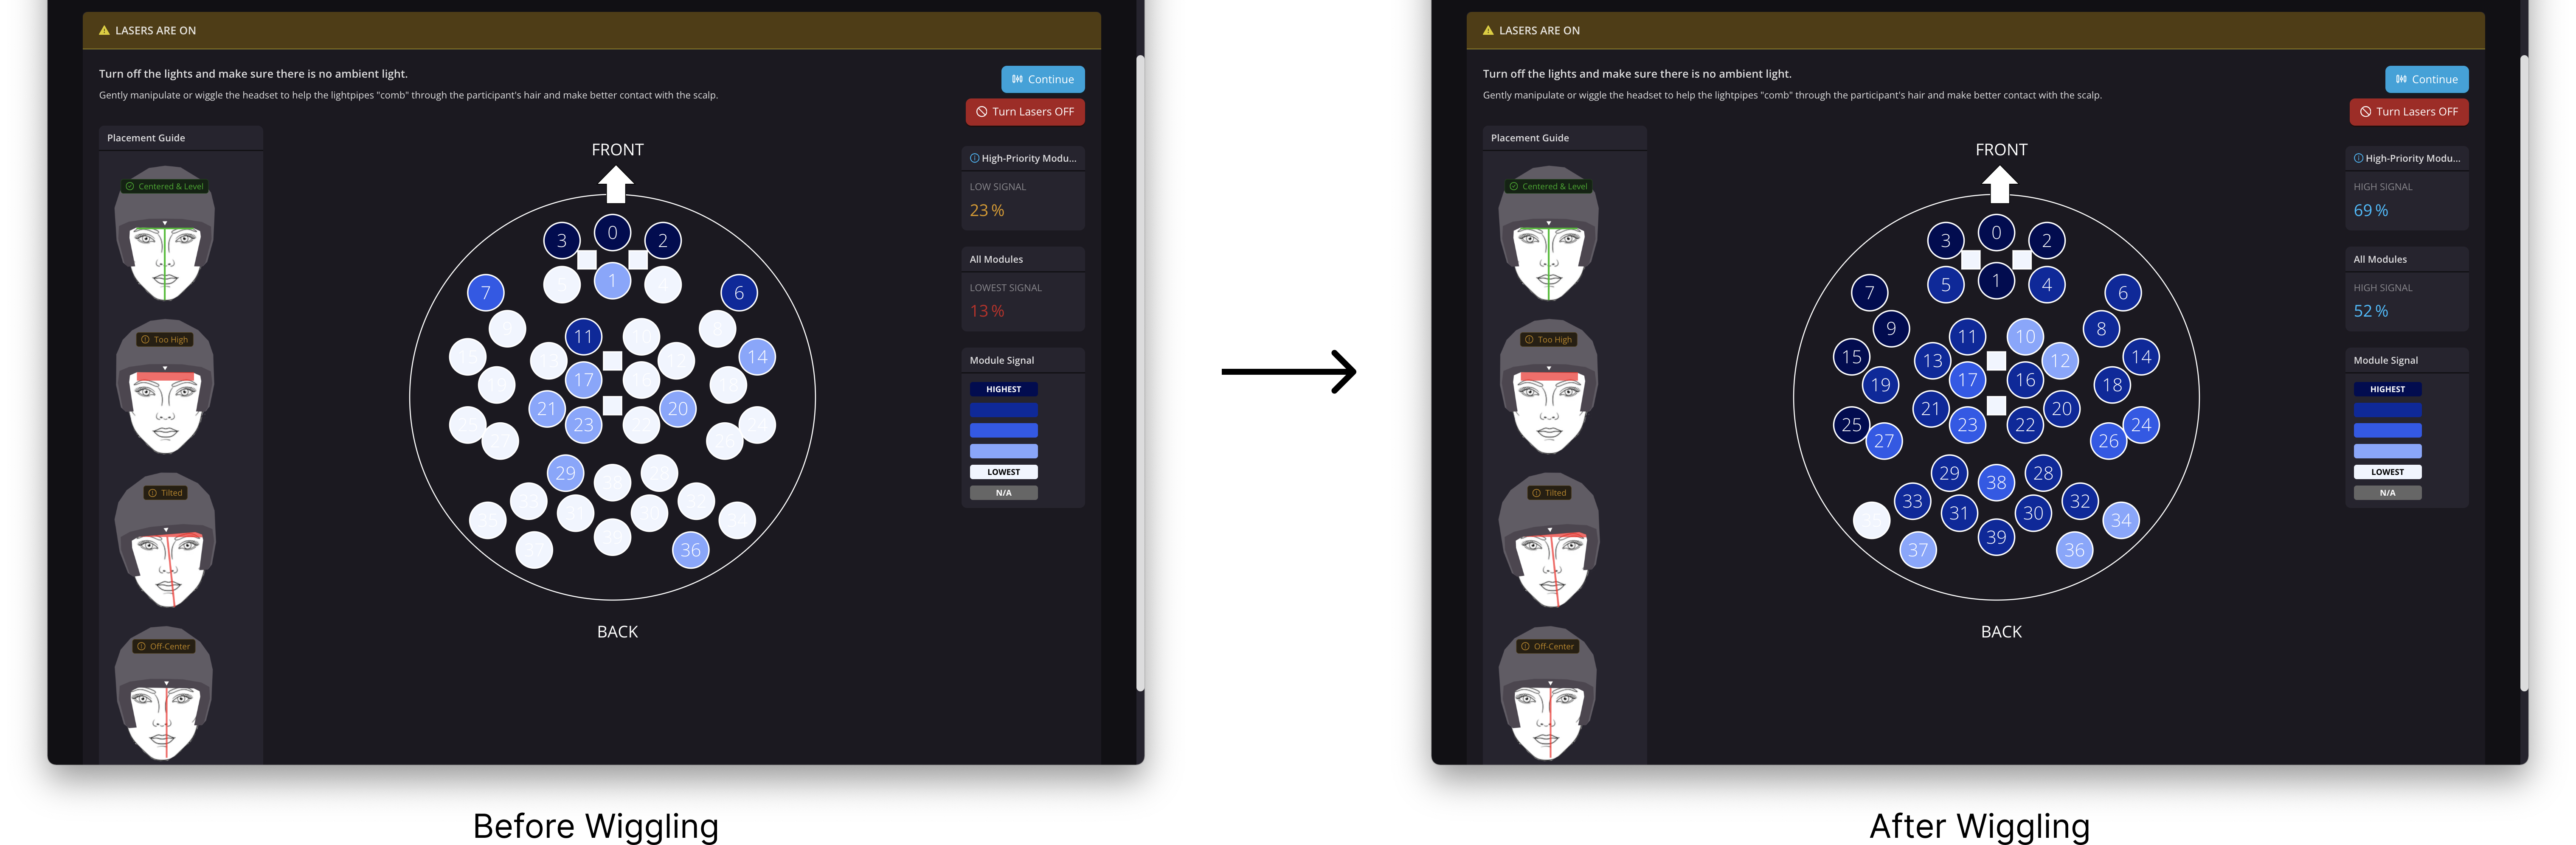
These videos demonstrate how the participant can wiggle the headset by themselves.