Once you have properly started up the Flow or DevKit system from the Flow tab on Portal, you have access to Portal's Flow UI.
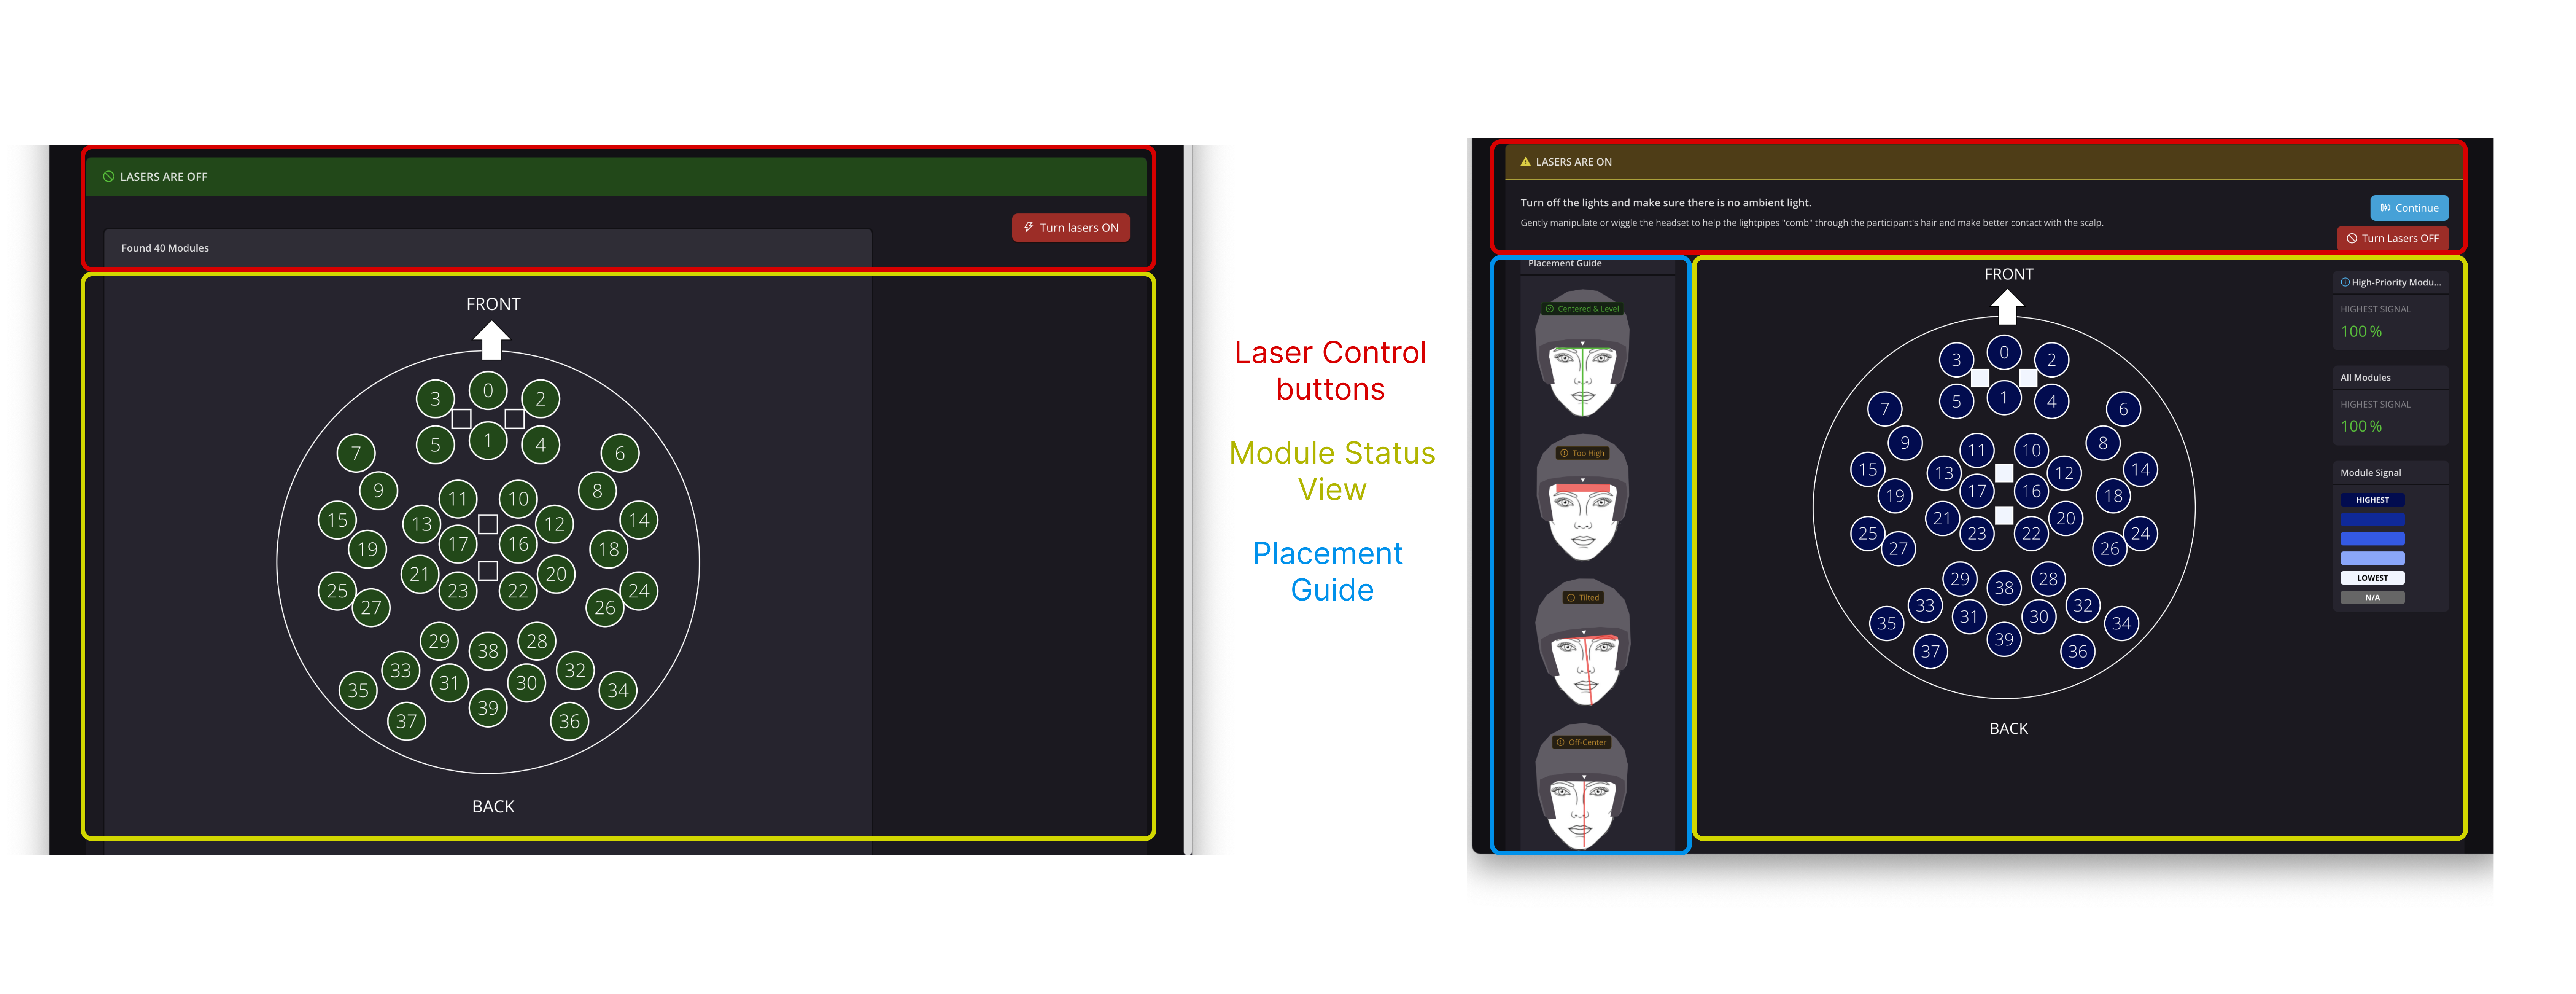
The window has three sections:
Laser Control buttons
At the top of the window, there are a set of buttons:
- Turn Lasers ON/OFF: Manually turns on (enable) or turns off (disable) all lasers.
- There is no indication on the headset itself whether the lasers are on or off.
- The color and text at the top of the Laser Control buttons bar indicates whether the lasers are OFF (green) or ON (yellow).
- Continue: Performs laser power adjustments (also known as "tuning lasers"). Lasers remain on after the Tune Lasers operation is complete. Tune Lasers must be performed each time the headset is placed on a participant's head. See Tuning the lasers for either Flow or DevKit.
Kernel Flow and DevKit utilize class 1 lasers. Please review the Laser Safety Warnings.
Module Status View
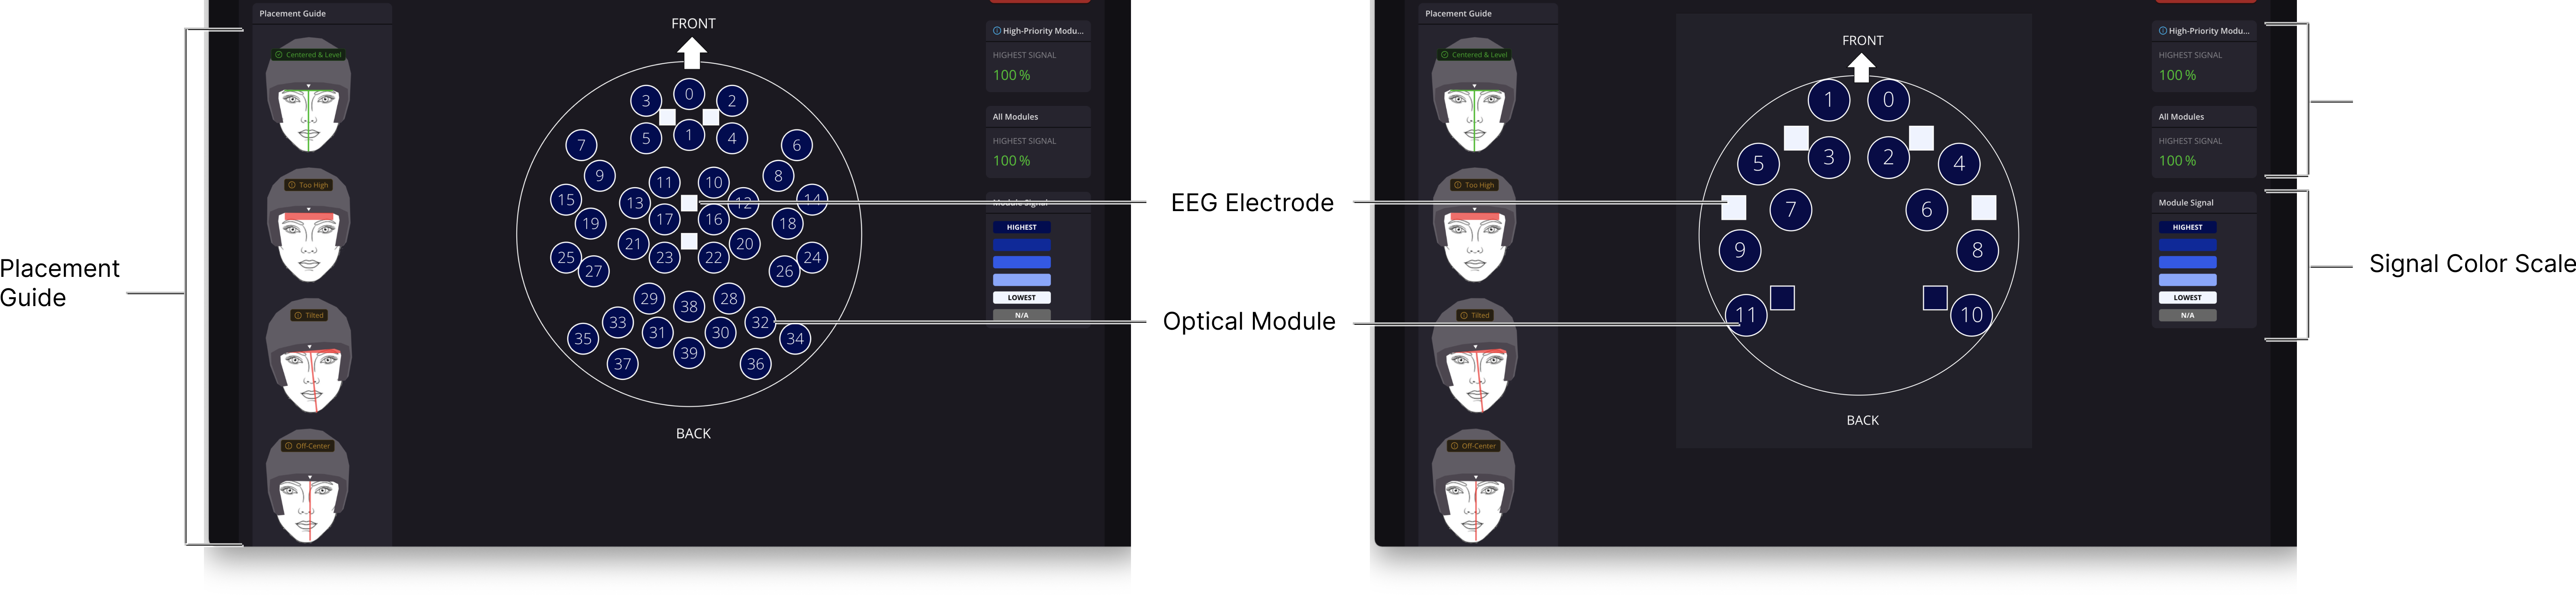
The main area of the window shows an outline representing a human head with each of the fNIRS modules (circles with numbers), and each of the EEG electrodes (squares) in the headset.
This view shows a map of the attached Kernel headset. When lasers are ON, the quality of signal received by each detector (and in aggregate by each module) is represented by the color as defined by the legend on the right. Darker blue indicates a better signal, while lighter blue/white indicates a worse signal. The aggregate quality of signal from groups of modules is displayed with numbers on the right. See Getting the Best Signal under the Flow or DevKit pages for more information.
Placement Guide
On the left side of the window, a placement guide is displayed. Kernel recommends positioning the bottom rim of the frontal plate to rest level on the eyebrows. The white placement arrow should align precisely with the center point between the eyebrows. Adhering to these guidelines is crucial when using Kernel-developed Unity tasks with default analyses in Portal, as the expected neural activations correspond to specific locations of the headset.
Data Acquisition controls
After you press Continue to tune the lasers, a new screen is presented with a series of buttons and fields used when recording a session.
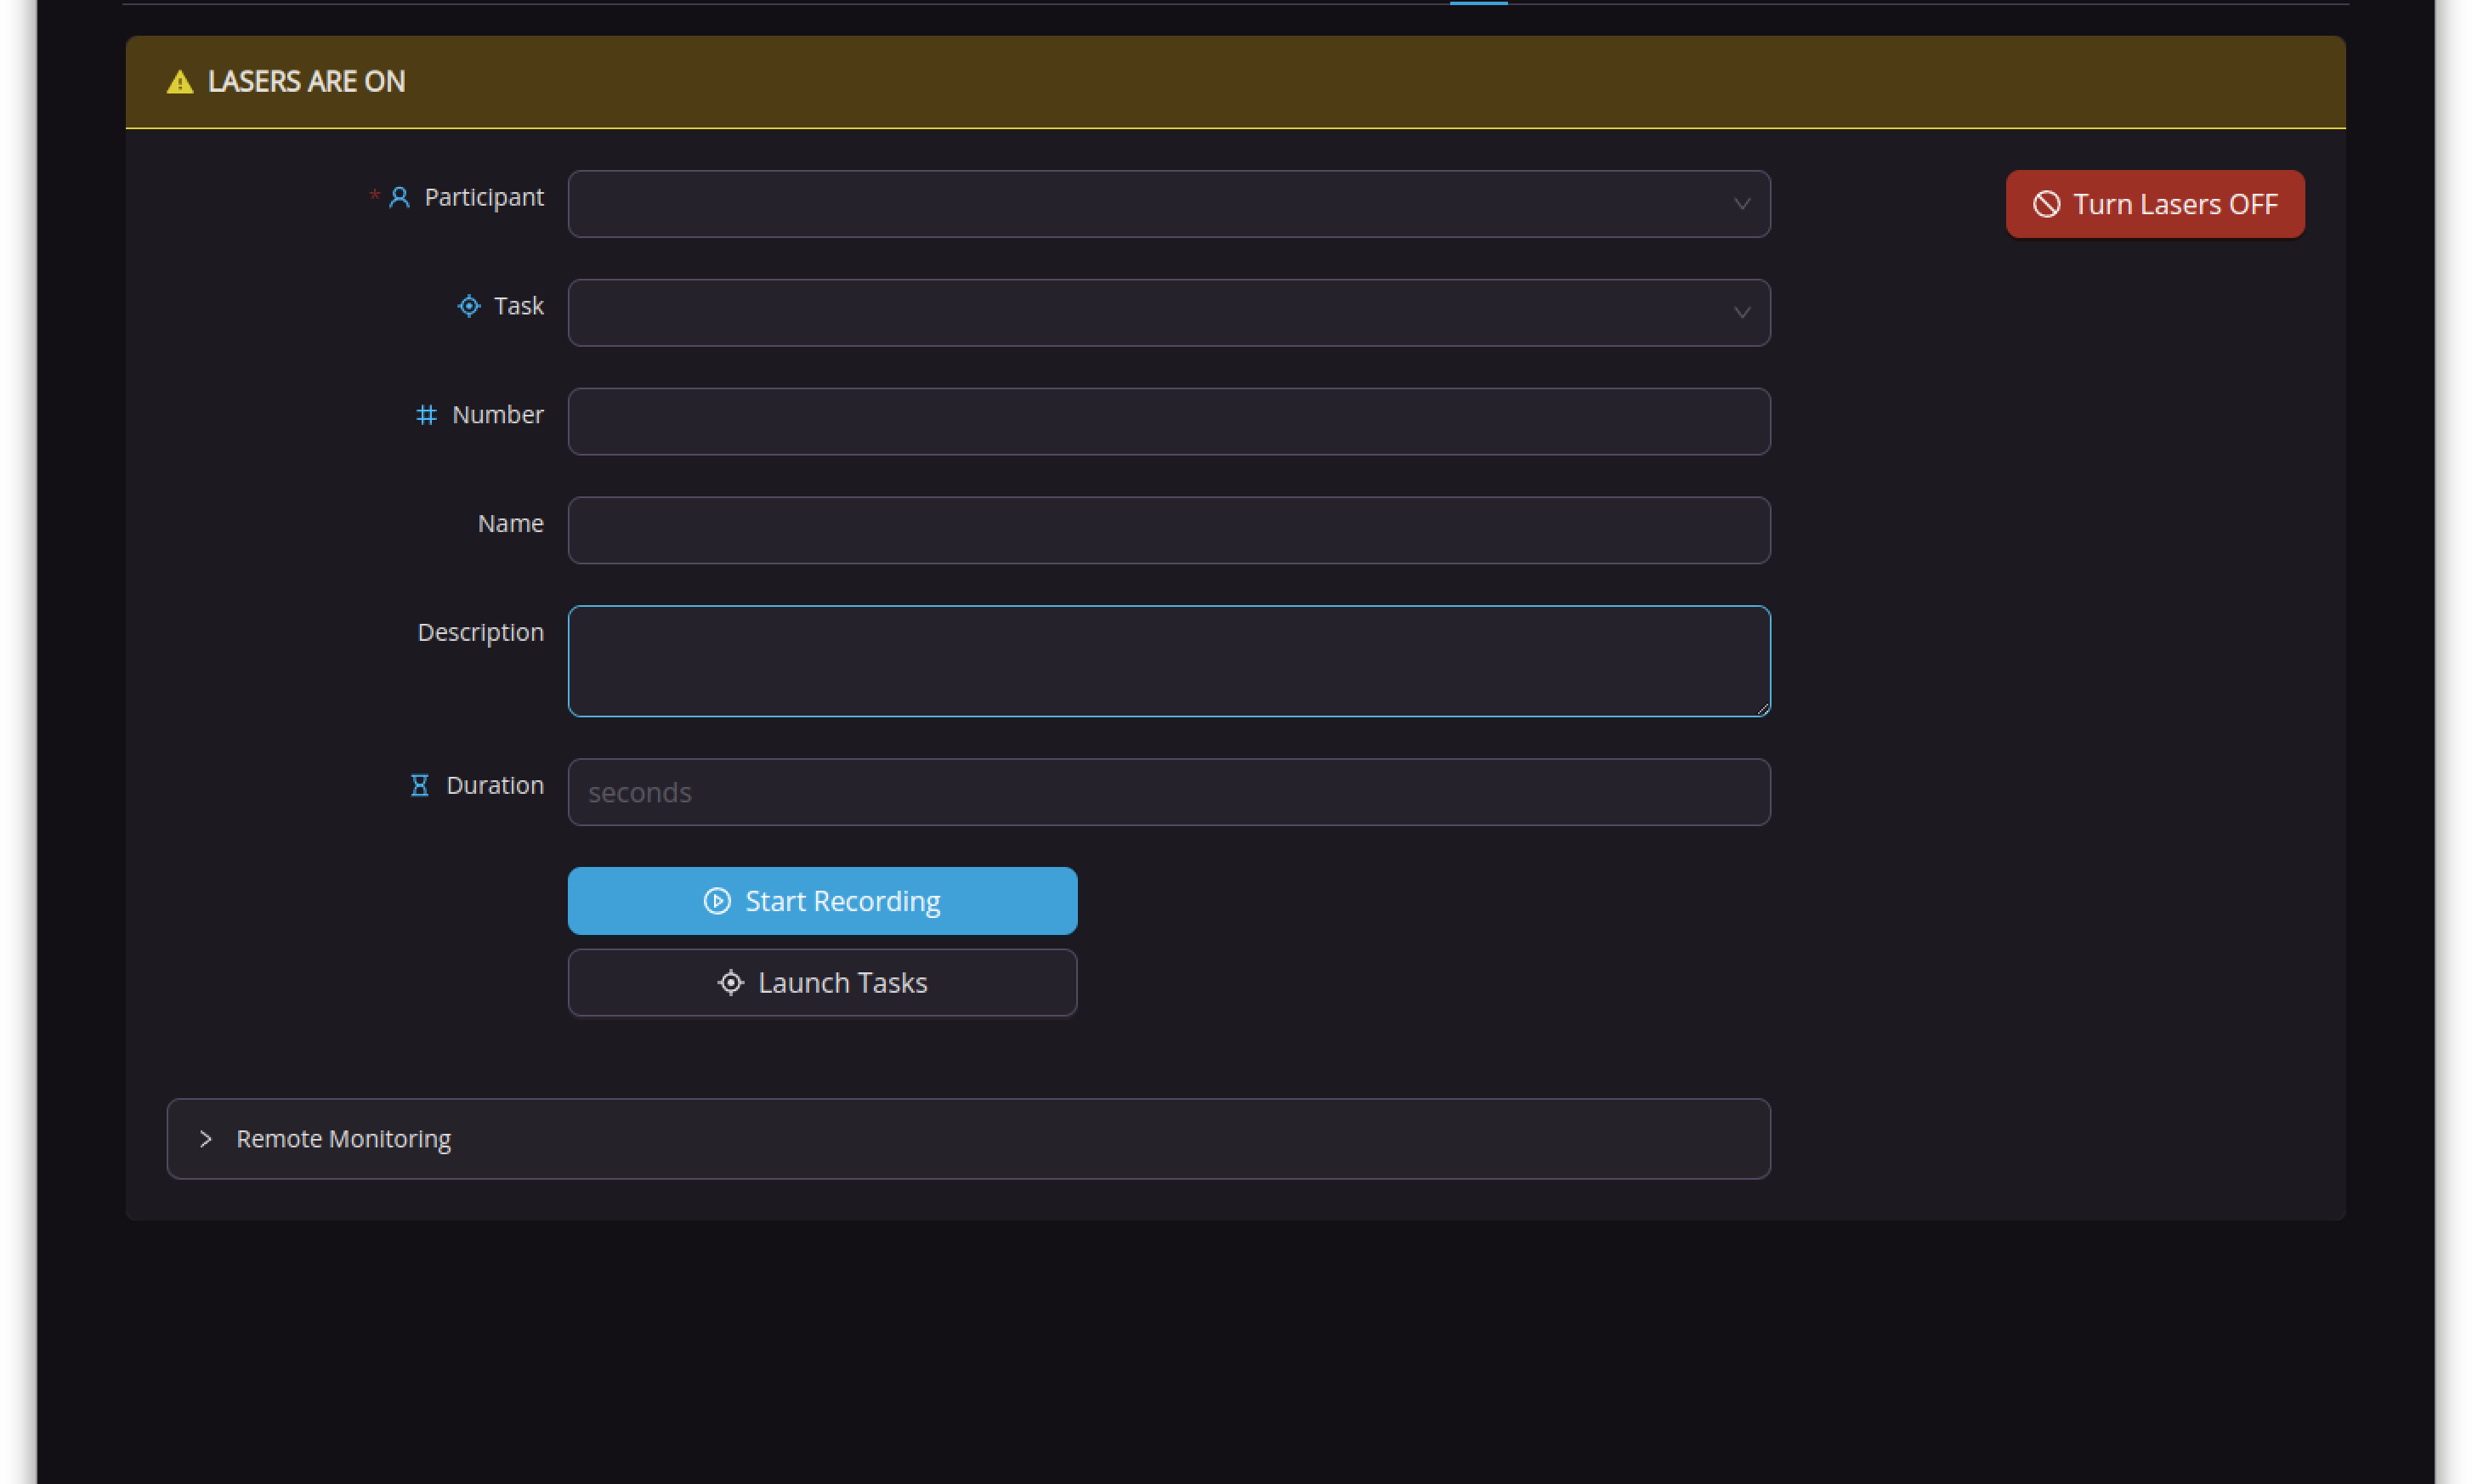
- Participant ID: Click this drop-down to select a Participant ID from the ones available in the Study in which you are recording. This field must be filled in to record.
- Task: Optionally click this pop-up to select a Task name from the ones available in the Study in which you are recording.
- Number: Optionally enter a number for the dataset.
- Name: Optionally enter a name for the dataset.
- Description: Optionally enter a description or notes about the dataset.
- Duration: Optionally enter a value in this field to limit the duration of the recording. Enter a number in seconds (eg: 600 = 10 min). You can still end a recording by clicking the Stop Recording button.
- Start Recording/Stop Recording: Clicking this button begins or ends the recording of a session. This button is only active if a Participant ID is filled out. While recording is ongoing, the button changes to Stop Recording.
- Launch Tasks: Use this button to launch Kernel's pre-built menu of Unity Tasks.
- Warnings: Warnings alert the operator of issues that may affect data quality, such as failing to tune lasers, module failures, etc.